words and images by Death Cookies
From the Gear Room: CAST SI&I Bindings
Last year Silas, Lars and the guys from CAST Touring introduced the innovative SI&I bindings system to the world of backcountry skiing, and I was lucky enough to get in on the first production run via kickstarter.
After three solid months using them on my DPS Wailer 112 carbons, skiing in a variety of conditions from New England to Canada, I can say this is a damn cool system that comes very close to being a single-quiver binding. Now if only there were such a ski…
First things first, do your homework about exactly which alpine binding + boot combinations are compatible. You can find out a lot from their website, and if you still have questions, send them an email or give them a call…I did, and Lars was very responsive and great to work with.
Also, if that last paragraph was confusing, the point behind the SI&I is to allow a skier to tour using the weight-saving Dynafit tech toe, then swap to a regular alpine binding for the ride down. Lightweight and excellent touring capability combined with no-compromise beefy alpine performance for the ride down. Pretty rad.
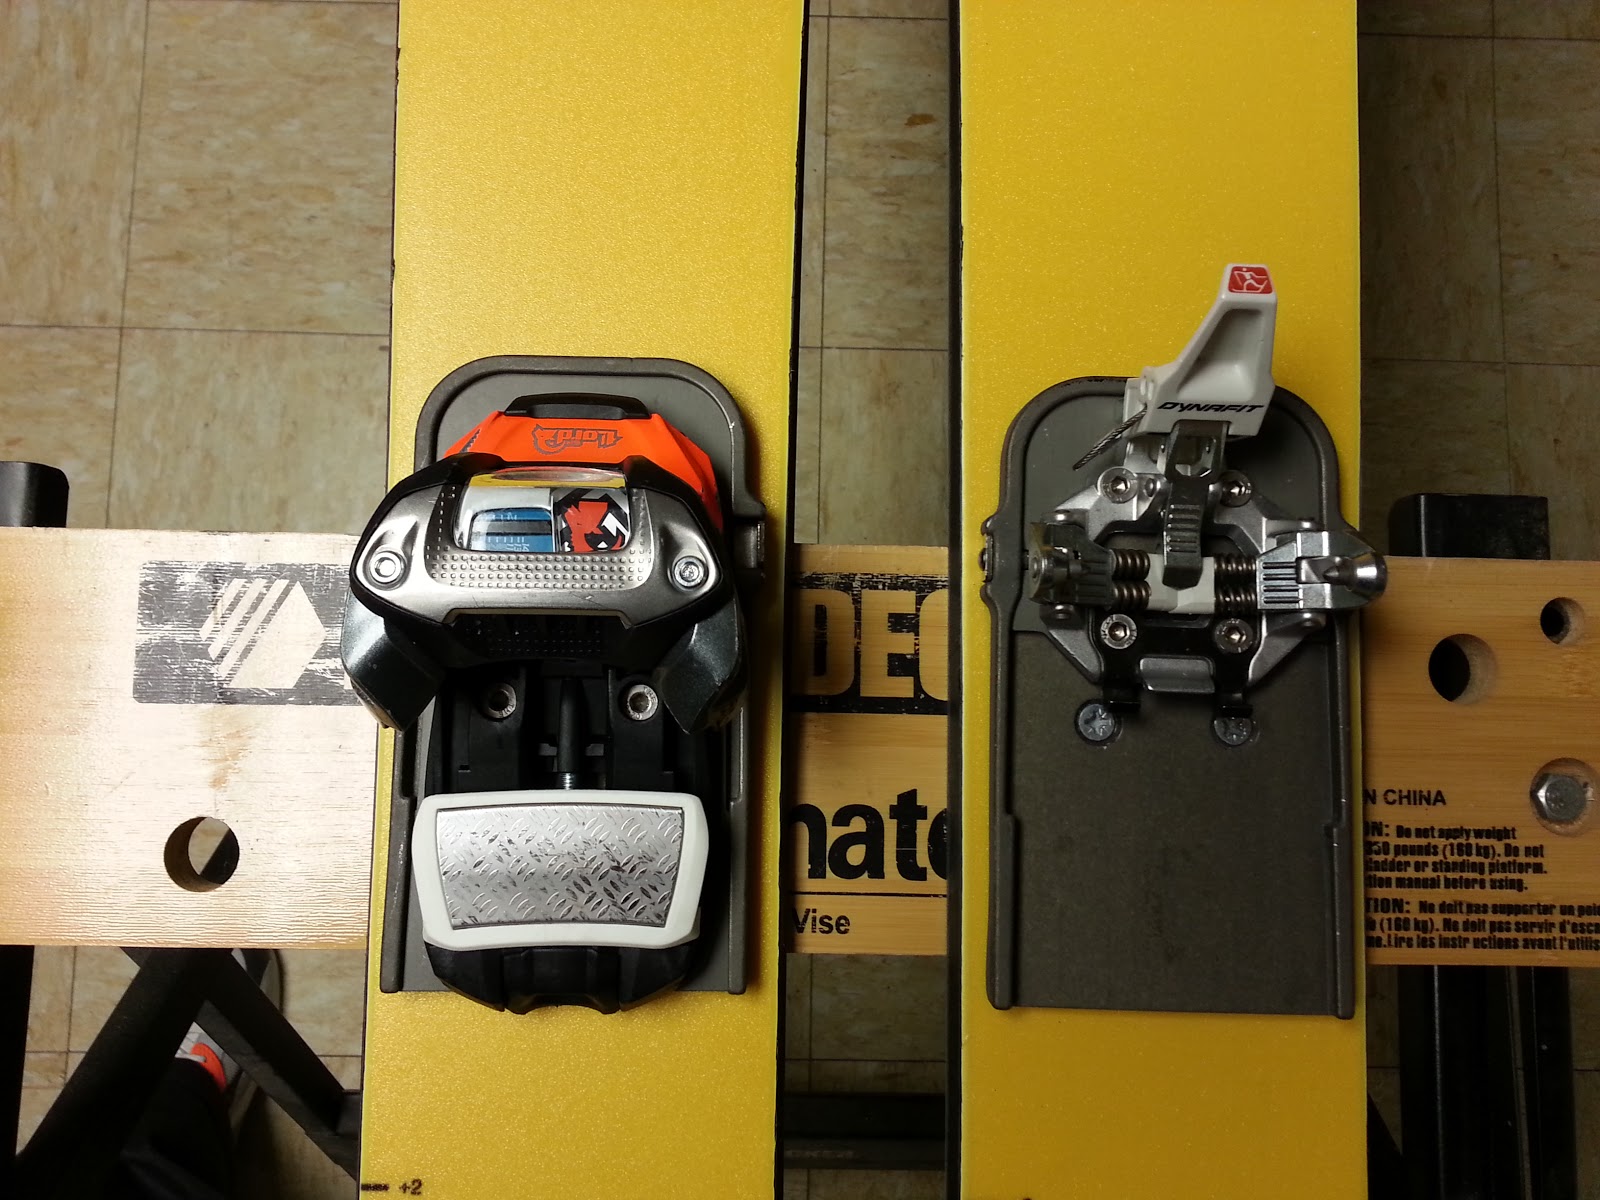
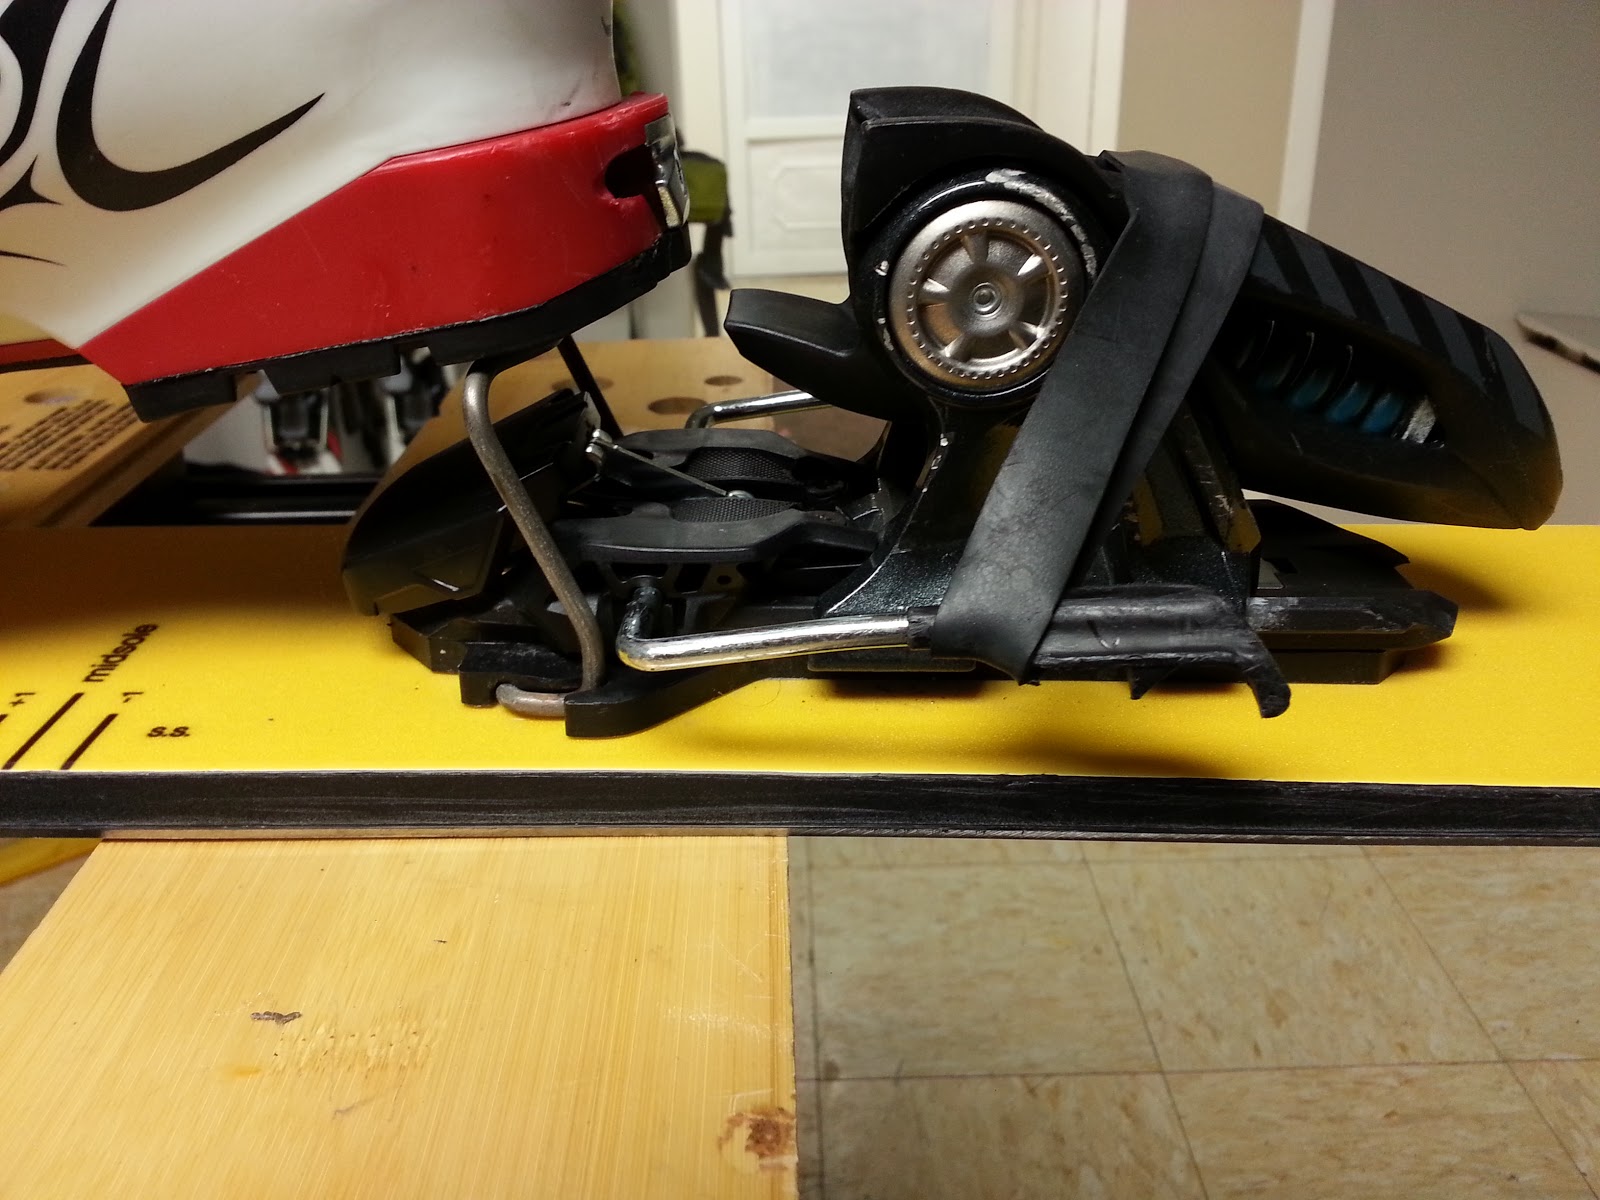
The foundation for the system are these plates that the toe pieces slide onto and off of. They do add a little bit of stack height to your bindings (unavoidable), but didn’t affect my performance one bit.
The alpine heel piece also mounts (permanently) to a small riser to get everything on the same level. Mine are the Marker Lord SPs, which I went with because they ‘officially’ accept my tech-soled Dynafit Titan boot. This means no swapping my boot soles, staying with the more comfortable tech soles at all times, which is sweet.
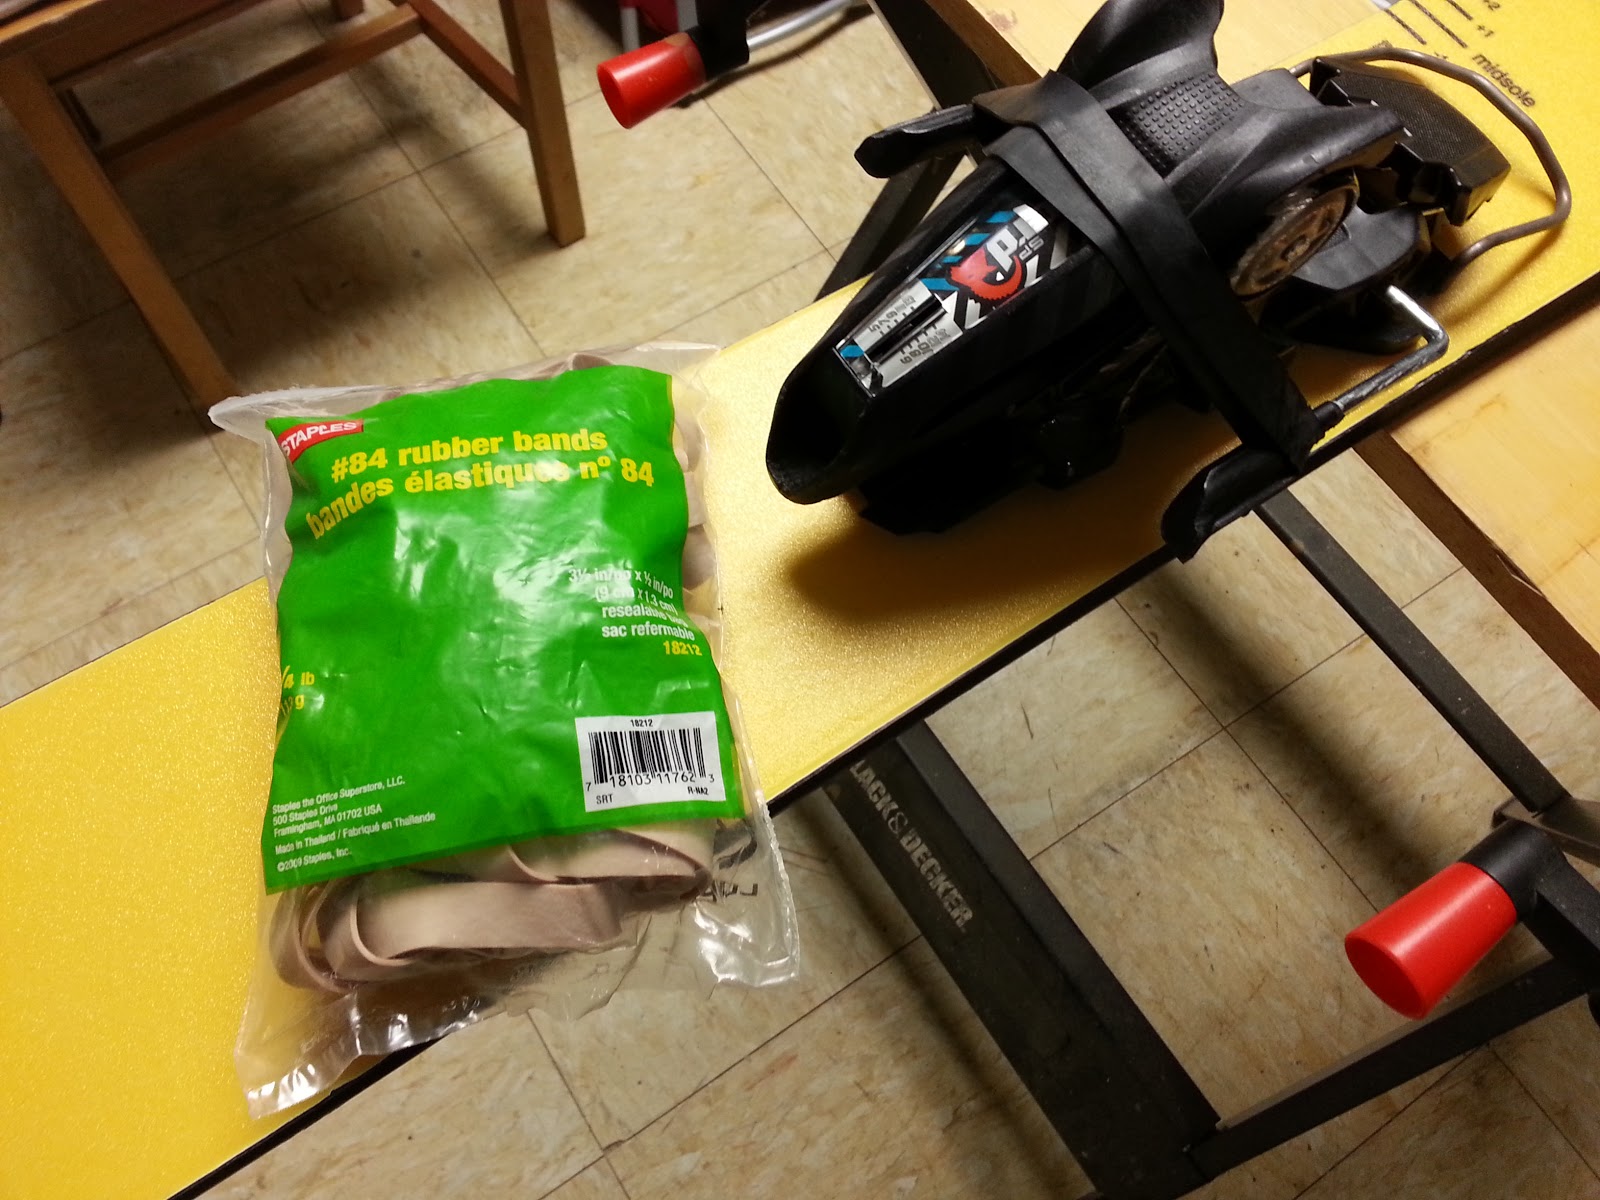
TIP #1 – RUBBER BANDS. Buy an entire bag of the thickest ones you can find. Stuff a dozen in your pocket on every outing, nothing will ruin a tour faster than the rubber band holding up the brakes snapping off. Yes this is mildly ghetto, but it does the job and as long as you carry extras, it’s no problem.
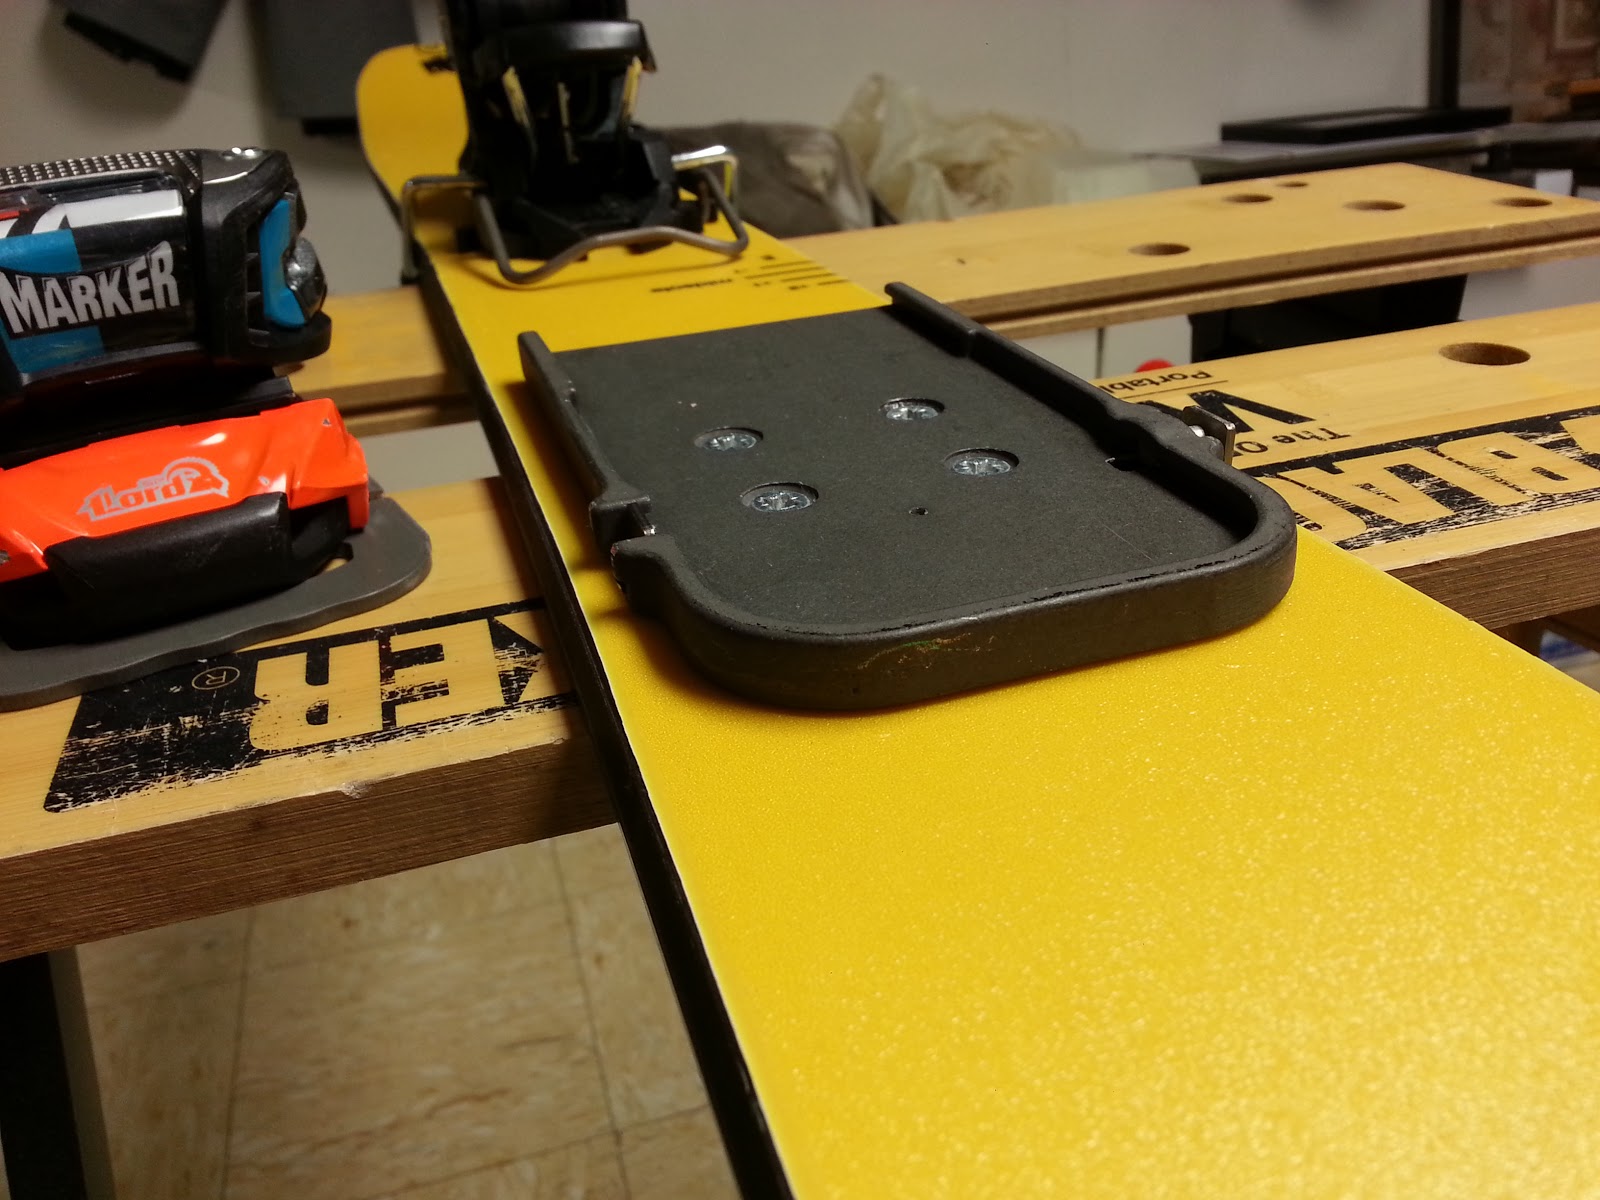
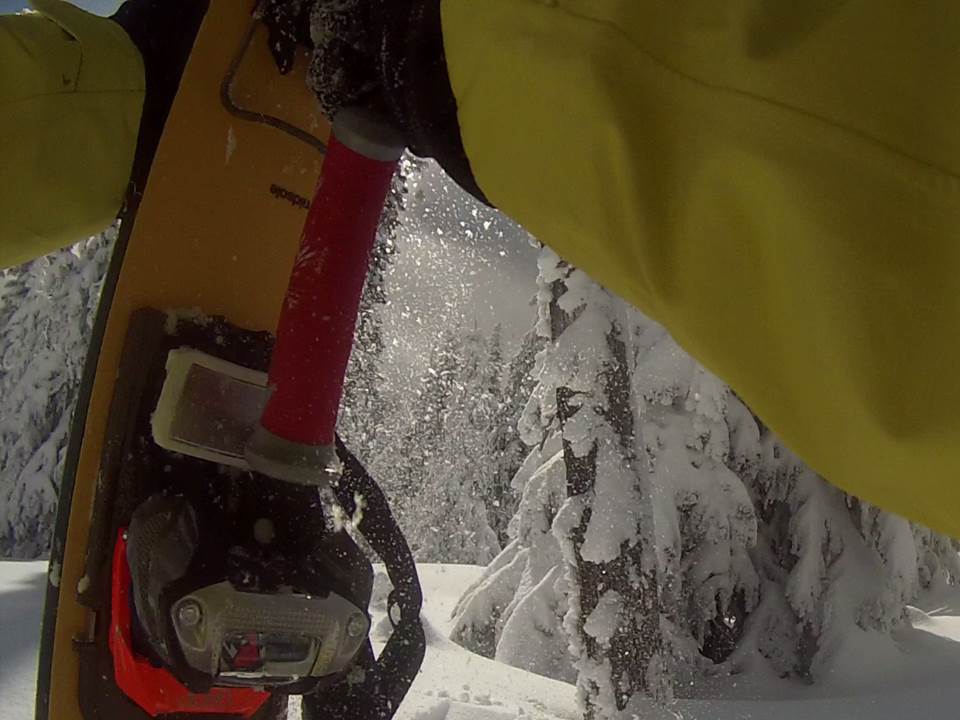
Heel riser is a simple, but effective metal tab that flips up for the tour, then down to fit under the pressure plate on the binding for the rest of the day. Don’t forget to put this down before going to click in, as I did once…you’ll find it impossible to get your heel in!
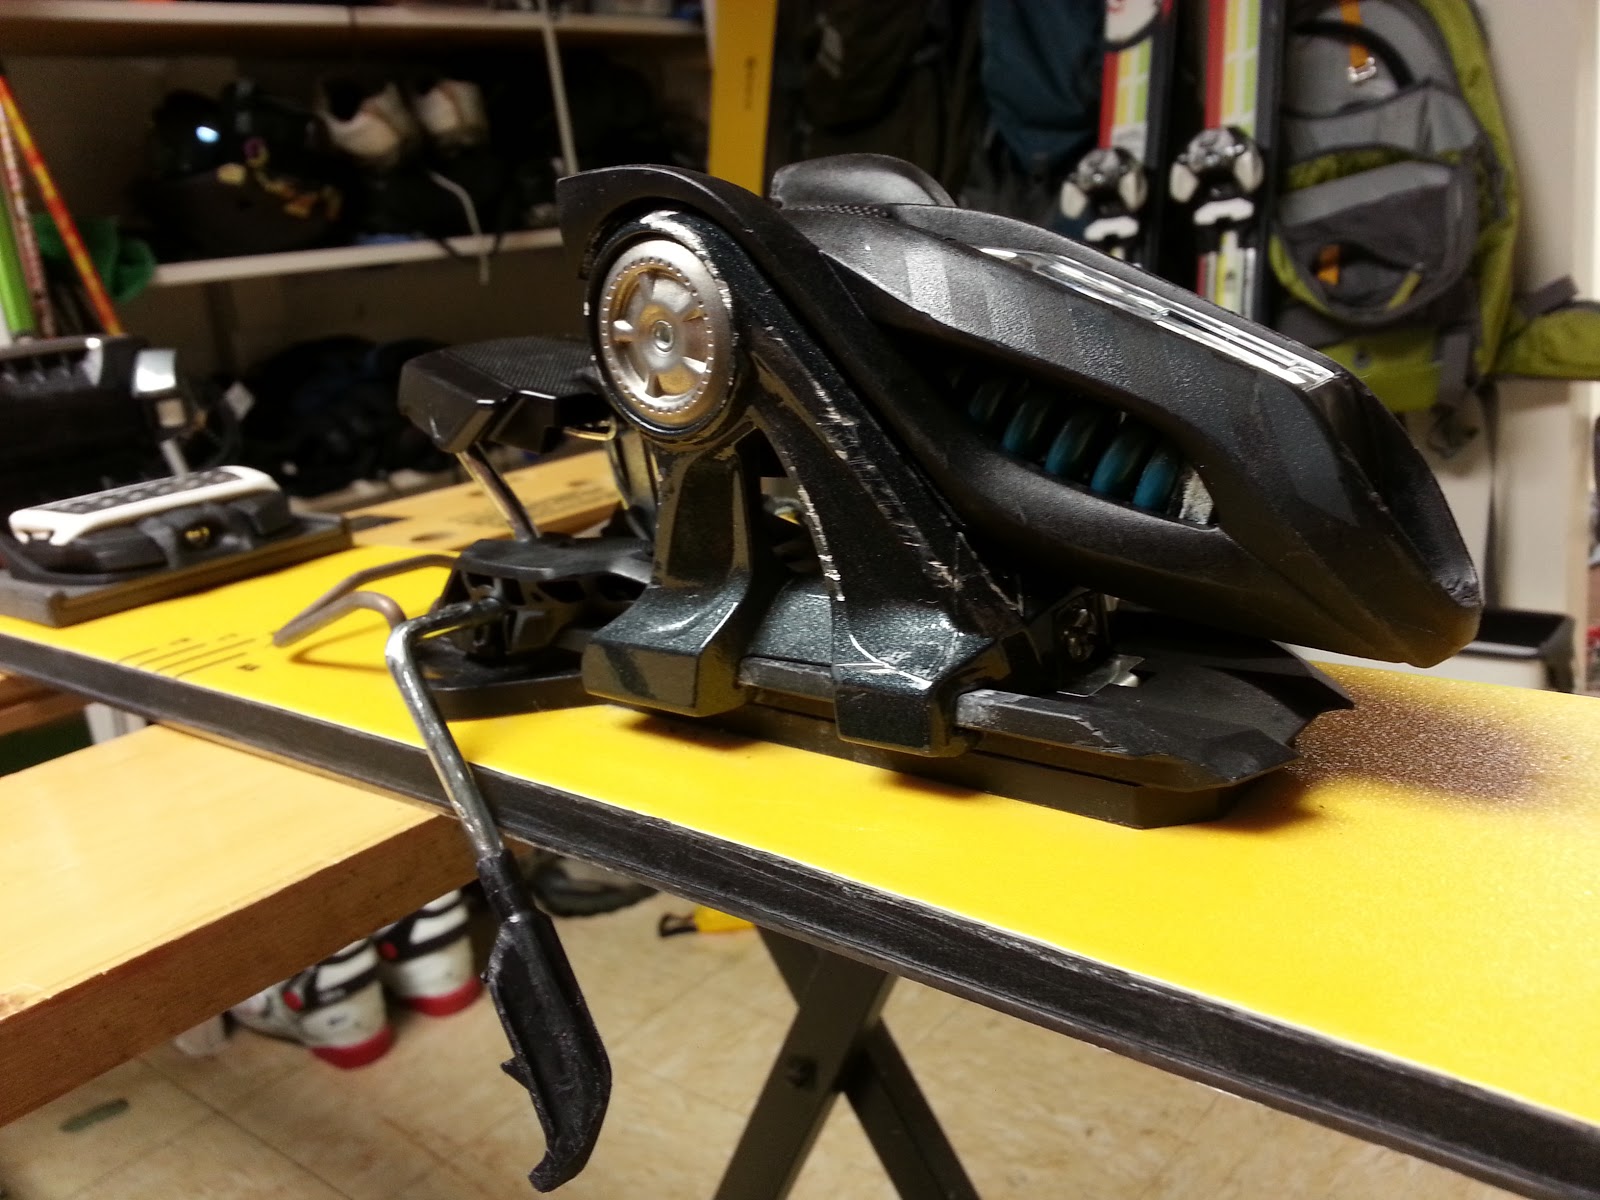
Full tour mode using the Dynafit toe. If you don’t own a tech boot, CAST can modify your alpine boot to accommodate the tech pins.

Next, the changeover. Pop out the pin that holds the toe piece in place, slide out the Dynafit, and replace with the alpine toe, click the pin back in.

Now, keep in mind this is easy as pie in your warm basement while snapping pics for the blog. Not nearly as smooth on a freezing mountain after a few hours of snow and ice working their way into every crevice, and you’re cold and in a hurry to get skiing.
Don’t be afraid to use your poles to get things moving…
TIP #2 – HAVE YOUR KNIFE OR MULTI-TOOL HANDY. You will absolutely need a sharp edge, every single time, to make sure you remove all of the snow and ice from the forward groove of the plate. If you don’t clear this out, the alpine binding won’t slide far enough in to secure with the pin, and you’ll feel dumb (and cold) as your buddies stand around impatiently waiting for you to figure this out.
I found it easiest to do this by propping the ski up with the tail in the air. Plus, if an animal decides to attack during this time, you’ll have your knife at the ready!

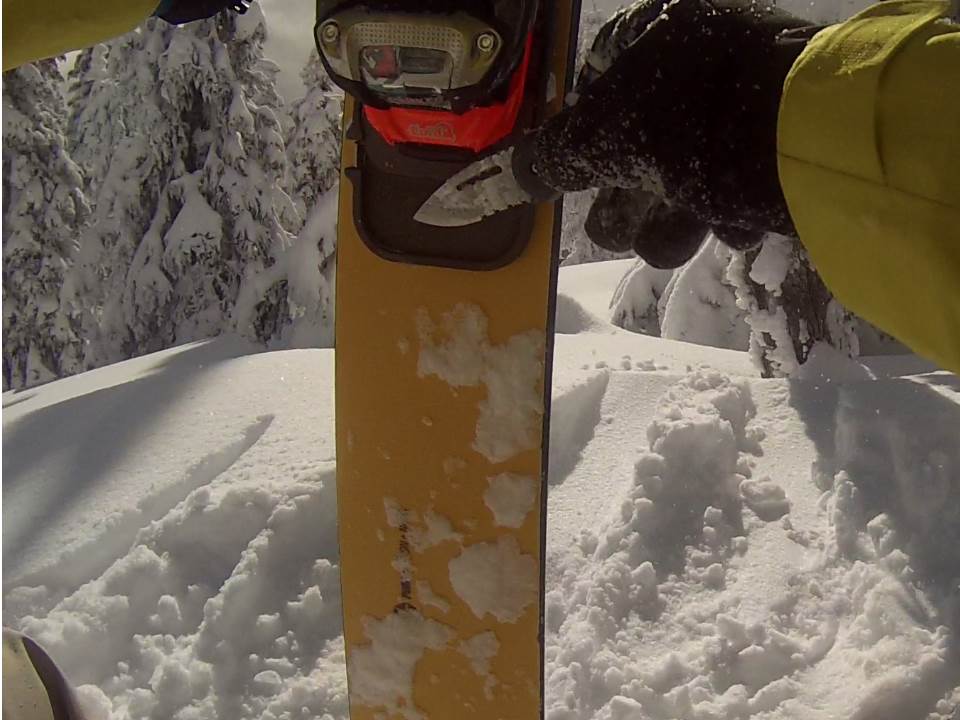
Here is the Lord toe piece, about to slide in. Another pointer is keep it in your pack until the moment you need it, because if you put it in the snow it will quickly freeze to the cold metal on the really frosty mornings…making it even harder to get it to slide smoothly into the frame.

Make sure you get the pin to ‘click’ all the way, so that you’re secure.
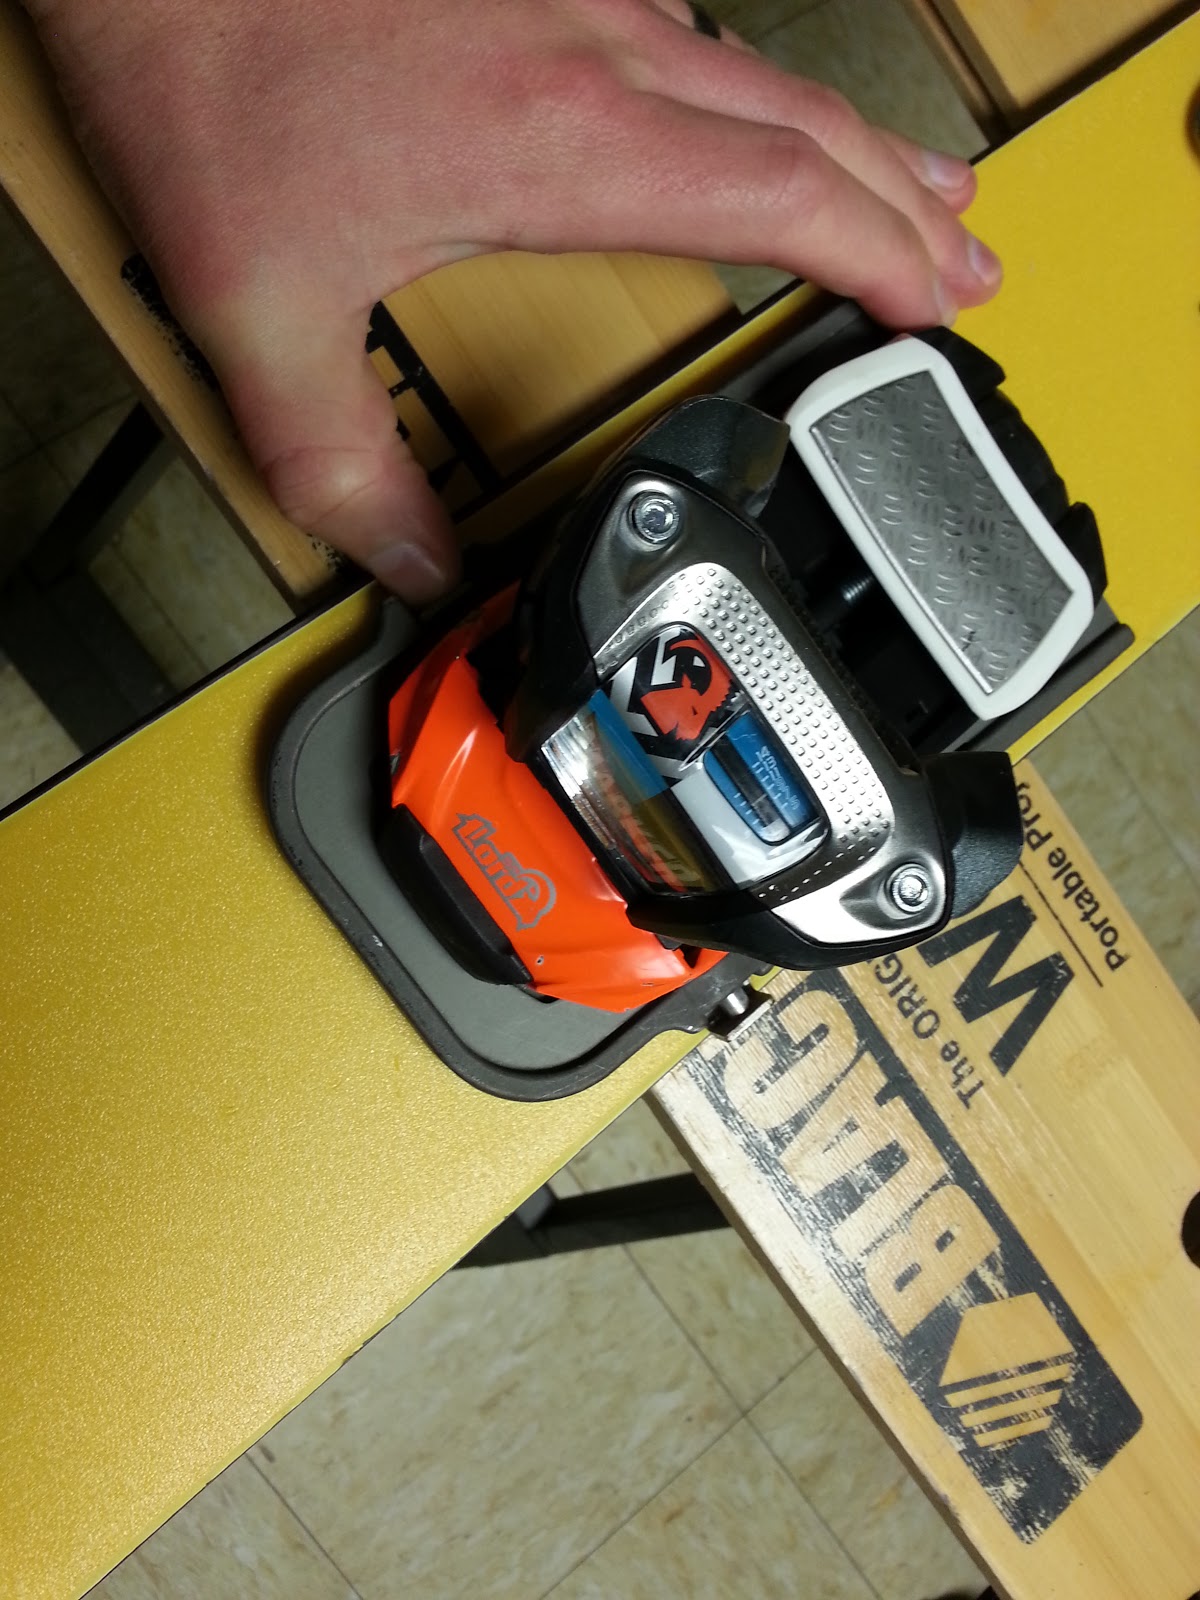
After that, you’re ready to go. You can see the pin more clearly in this picture. I never once felt the toe move on the way down, it is rock solid.

The benefits to this system are numerous, and obvious. No sacrificing performance on either the up or the down, and as a bonus they make great fodder for your lift conversations with other gear heads.
Only downside is it’s not a quick changeover, and not something you’ll want to be doing in really steep terrain because you have to take your skis (and pack) off. I have Atomic Tracker AT bindings on my other setup and I won’t lie they are significantly easier to manage when transitioning…I can do it all with my pole and good stomp. But they’re also noticeably heavier, which is where the SI&I really stands out.
If you’re looking for the best of both worlds and don’t mind spending a few more minutes going from touring to ripping, you’ll love what CAST has to offer.

If you love ski touring, but find that it just isn’t enough of a pain in the ass, the CAST System is for you!
Great article. A couple of things I noticed after touring on these for half a season. I found using some silicon spray helped keeping the toes from icing up. I also found that the toe lever on the Dynafits worked nicely for clearing any ice from under the lip of the toe plate.
Ok then buy a pair of salomans or markers. They still have less parts and are just as heavy
+1 on learn to ski
Come on. Next thing you’re going to tell me is a splitboard is totally efficient. You save no weight actually are carrying more and have a bunch of extra parts to brake and ruin your day. Lock out the toe on the Dynafit and learn how to ski.
I think this is a great concept! I have been following it since they launched the kickstarter and am stoked to try them. while I wish my balls were as large as Eric Hjorleifson I just am not as confident to spin tricks on dynafits in the lockout position. I think it is great idea for freestyle skiers to try this and see how it works.