
If you’re riding hydraulic disc brakes, you’ve probably dealt with less than ideal lever feel. Air will eventually find its way into your lines one way or another. That sneaky stuff…
If your brakes are completely non-functional, you’ll need a full bleed, which is beyond the scope of this article. Brakes aren’t something to experiment with, so please consult a qualified bike mechanic if you are not comfortable bleeding hydraulic lines. Plus, it can turn into a slippery mess rather quickly.
If your brakes are simply spongy or get progressively stronger after a few lever pulls, this quick fix is for you. You likely have a small amount of air in the lines that is simple to remove. This method can also be effective after cutting or shortening a hydraulic line if you’re careful not to lose to a ton of fluid.
I am not intimately familiar with every brake system out there, so consult your user manuals. This should work for Shimano and SRAM brakes and probably other brands too. Today I’m working on a Shimano XTR Race Brake.
Here’s how to do it:
Step 1: You’re going to need a simple bleed kit. We’re not doing a full bleed, but you’ll need a few bits and pieces. I got this ” EZ Bleed Kit” from Jeff Bezos for a few bucks. You’ll also need a small amount of brake fluid; make sure you confirm whether your system uses DOT or Mineral Oil.

Step 2: Position the bike so the brake lever is at the highest point. We want all the air moving upwards to the lever. If you’re working on the front brake, having the bike upright on the wheels or in a stand is good. Hanging by the front wheel works well for the back brake. In either situation, I like to rotate the lever slightly so that it’s parallel to the ground. It makes adding fluid a lot easier.

Step 3: Adjust the brake lever throw to the spongiest position. Most brakes have a small hex screw on the inside of the lever. Often your brakes will feel worse with the lever closest to the bar. This step isn’t critical, but I find it helpful.

Step 4: Open the reservoir at the lever by removing the small screw. This will be different on every brake system, but on Shimano and SRAM, it looks about the same. Make sure not to lose the screw or the small o-ring, and be careful not to over-tighten this screw on reinstallation later.

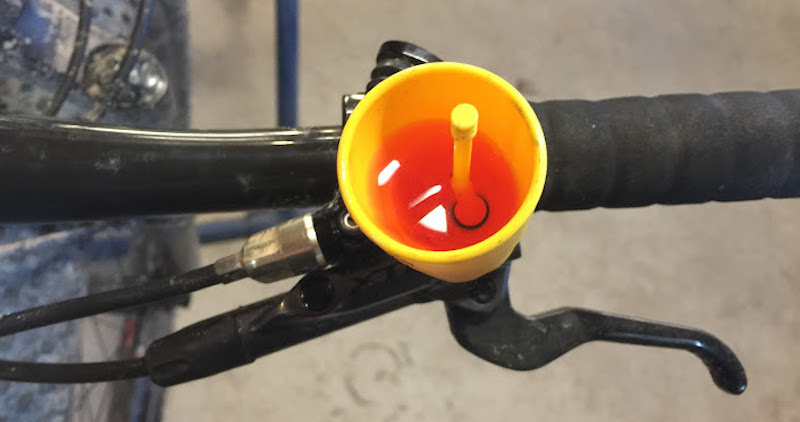
Step 5: Screw the fluid cup into the lever screw hole (the screw you just removed). Fill the cup about half full with fluid. Try not to get any fluid on your rotors or pads if they’re directly underneath.

Step 6: Flick and squeeze the brake lever, jiggle the lines, tap on the calipers. It’s more art than science, but you want to agitate the system to encourage air bubbles to make their way out. You should see some air bubbling out of the lever and into the fluid cup if things are working. Don’t spend an hour here. Once you’re not getting any more results, it’s time to close up the system.

Step 7: Close up the system. Remove the fluid cup (there’s a small plug stick you can use), reinstall the screw, and adjust your lever throw and position back to where they started. Clean up any brake fluid drippings, confirm your brakes are functional and make sure you have no fluid leaking from the lever. Hopefully, they feel a heck of a lot better. Mine do.
That’s it—time to ride.
Is this The Mike Lavery of ND cyclerizing fame? 🙂
Any tips on how to fix brakes that squeal?
Likely it’s from dirty rotors or pads. Try cleaning your rotors off with alcohol or brake cleaner from the auto parts store. If that doesn’t work, a new set of pads might be in order.
Thanks!!