Making a tour plan is one of the best ways to mitigate risk while traveling in the backcountry – in the winter or summer. CalTopo is a free online software that allows users to map backcountry routes, print maps, and use them on their new GPS app. CalTopo offers a ton of features that make it an ideal software for mapping tour plans.
Step One: Click “Start Mapping” and Make an Account
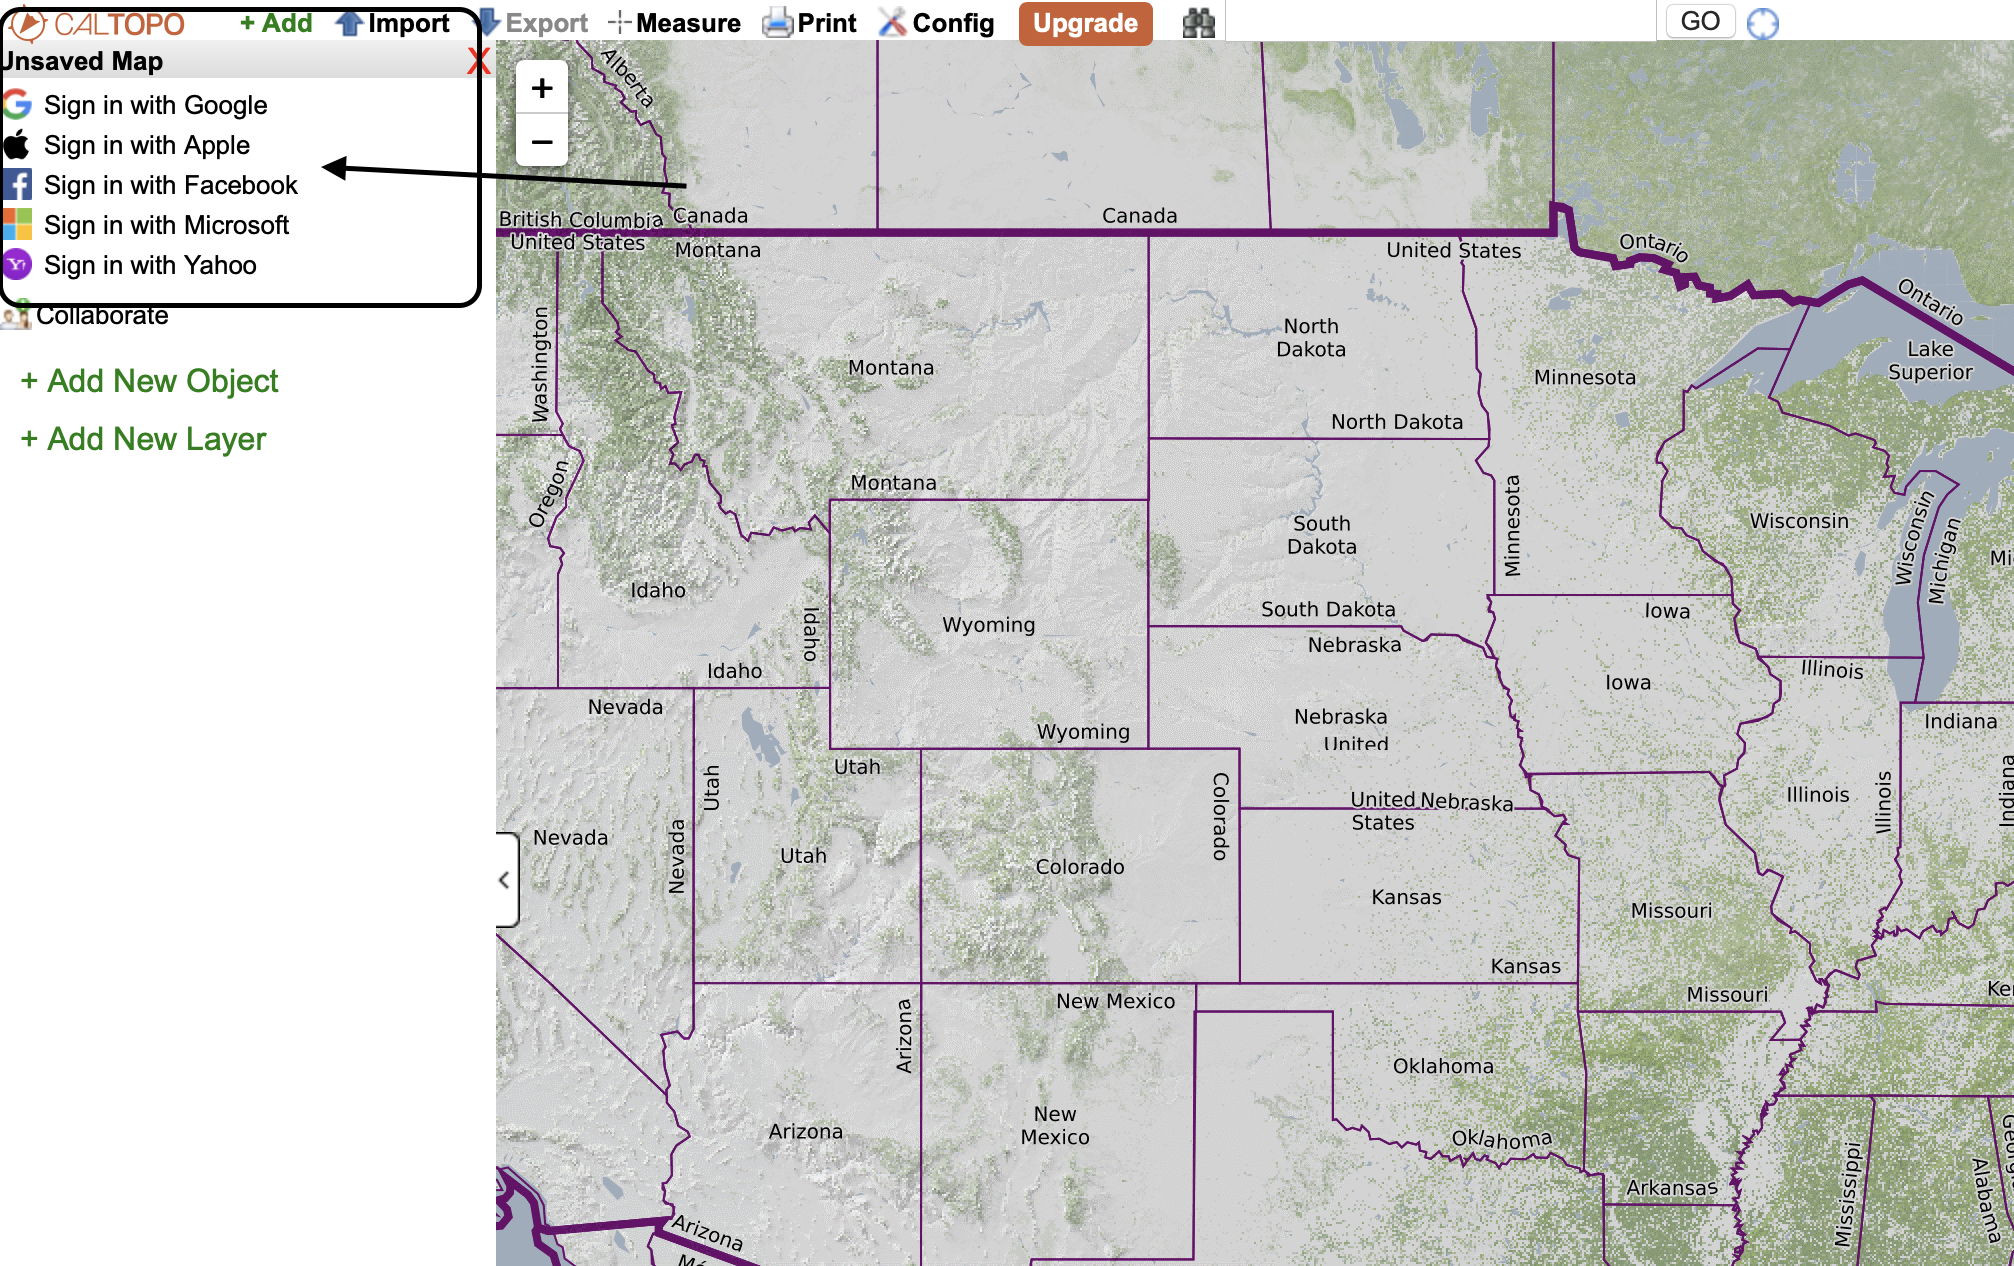
Making an account is not mandatory, although it allows you to save your tour plans for later reference. After clicking “start mapping” in the upper right-hand corner of CalTopo’s home page, make an account by clicking one of the sign-in options in the upper left-hand corner.
Step Two: Find the Tour Location
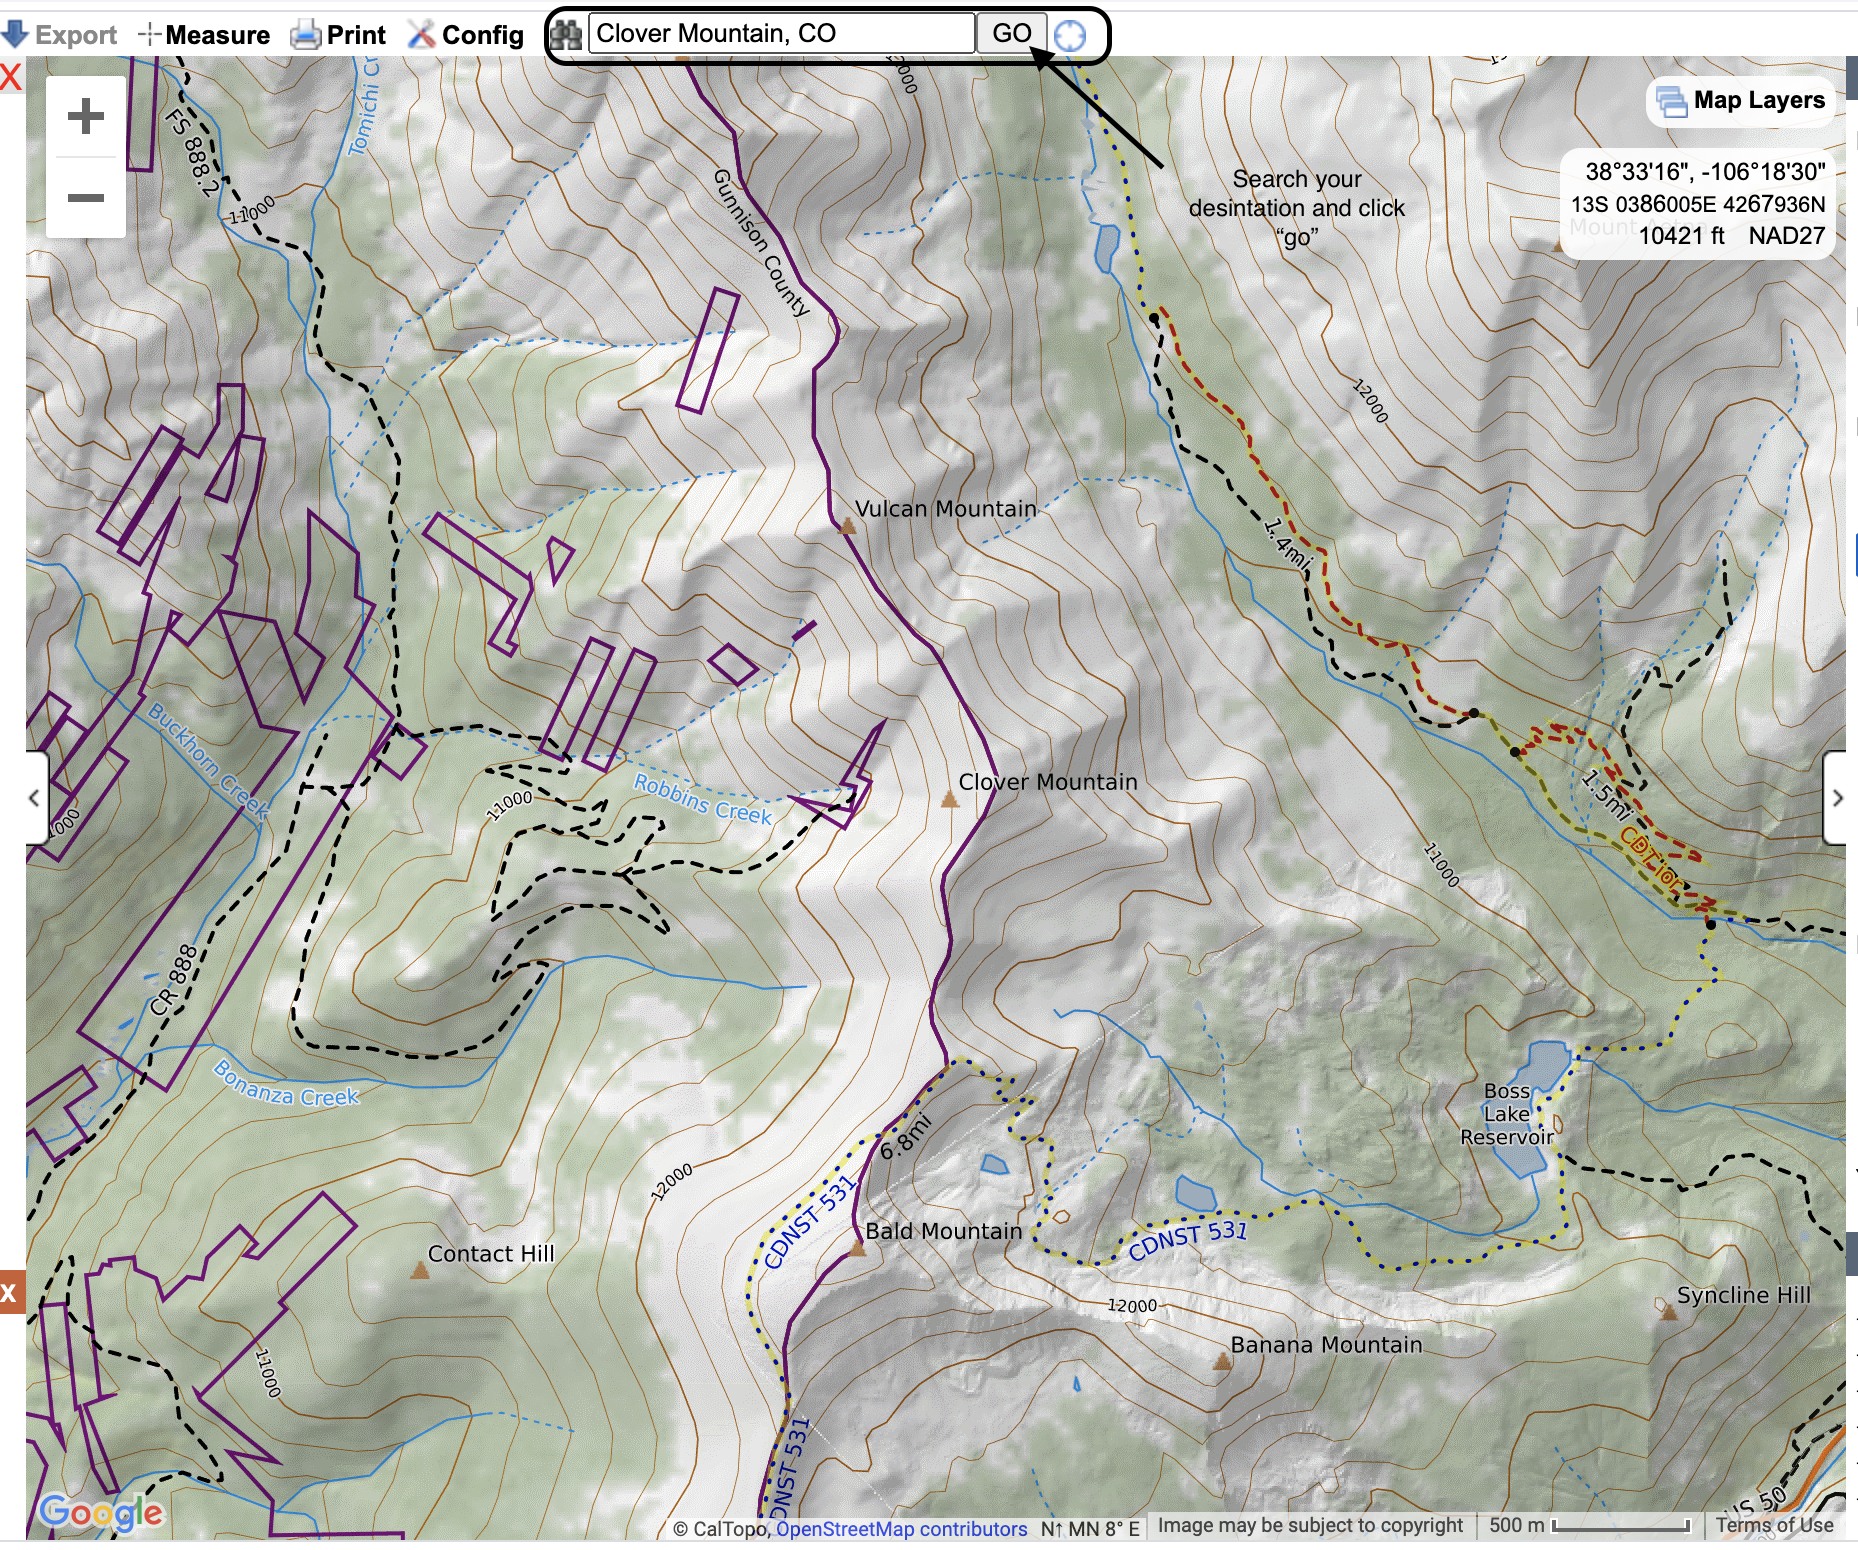
The easiest way to find where you are touring is to use the search bar in the toolbar on top. If you do not find your objective this way, you may have to search the closest town and scroll on the map from there.
Step Three: Prepare Your Map Layers
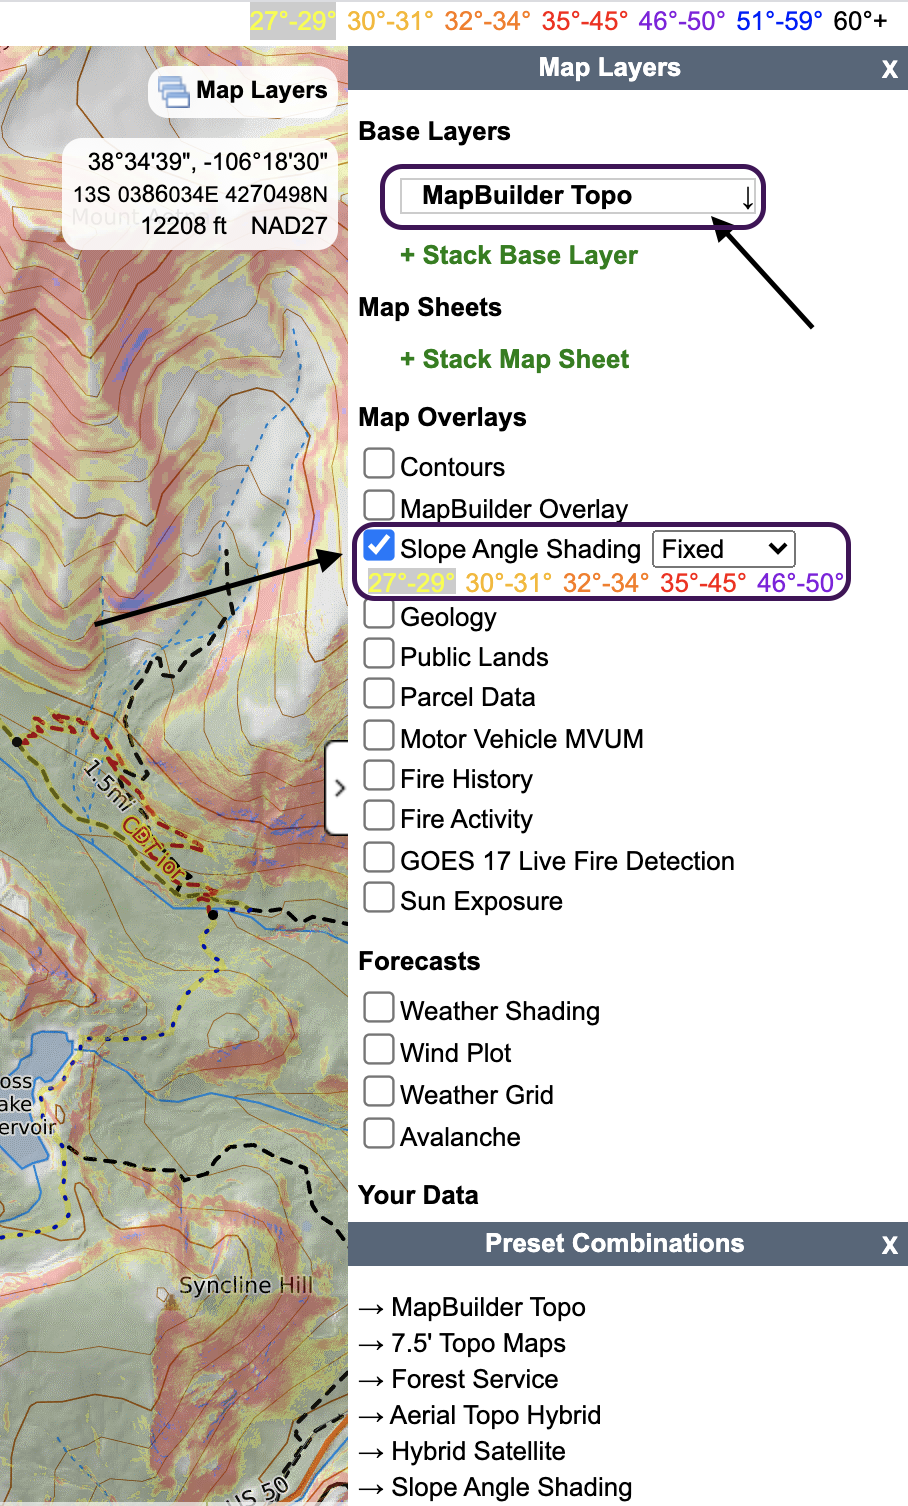
On the right-hand side of the screen, you will find an icon that says “Map Layers.” Click this icon to open the map layers toolbar. In the toolbar, choose MapBuilder Topo (or your preferred map) under Base Layers and Slope Angle Shading under Map Overlays. This will prepare your map so you know where potential avalanche terrain is. You can use the avalanche forecast to avoid avalanche terrain, aspects, and elevations in conjunction with your tour plan.
Step Four: Add the Route and Plan B
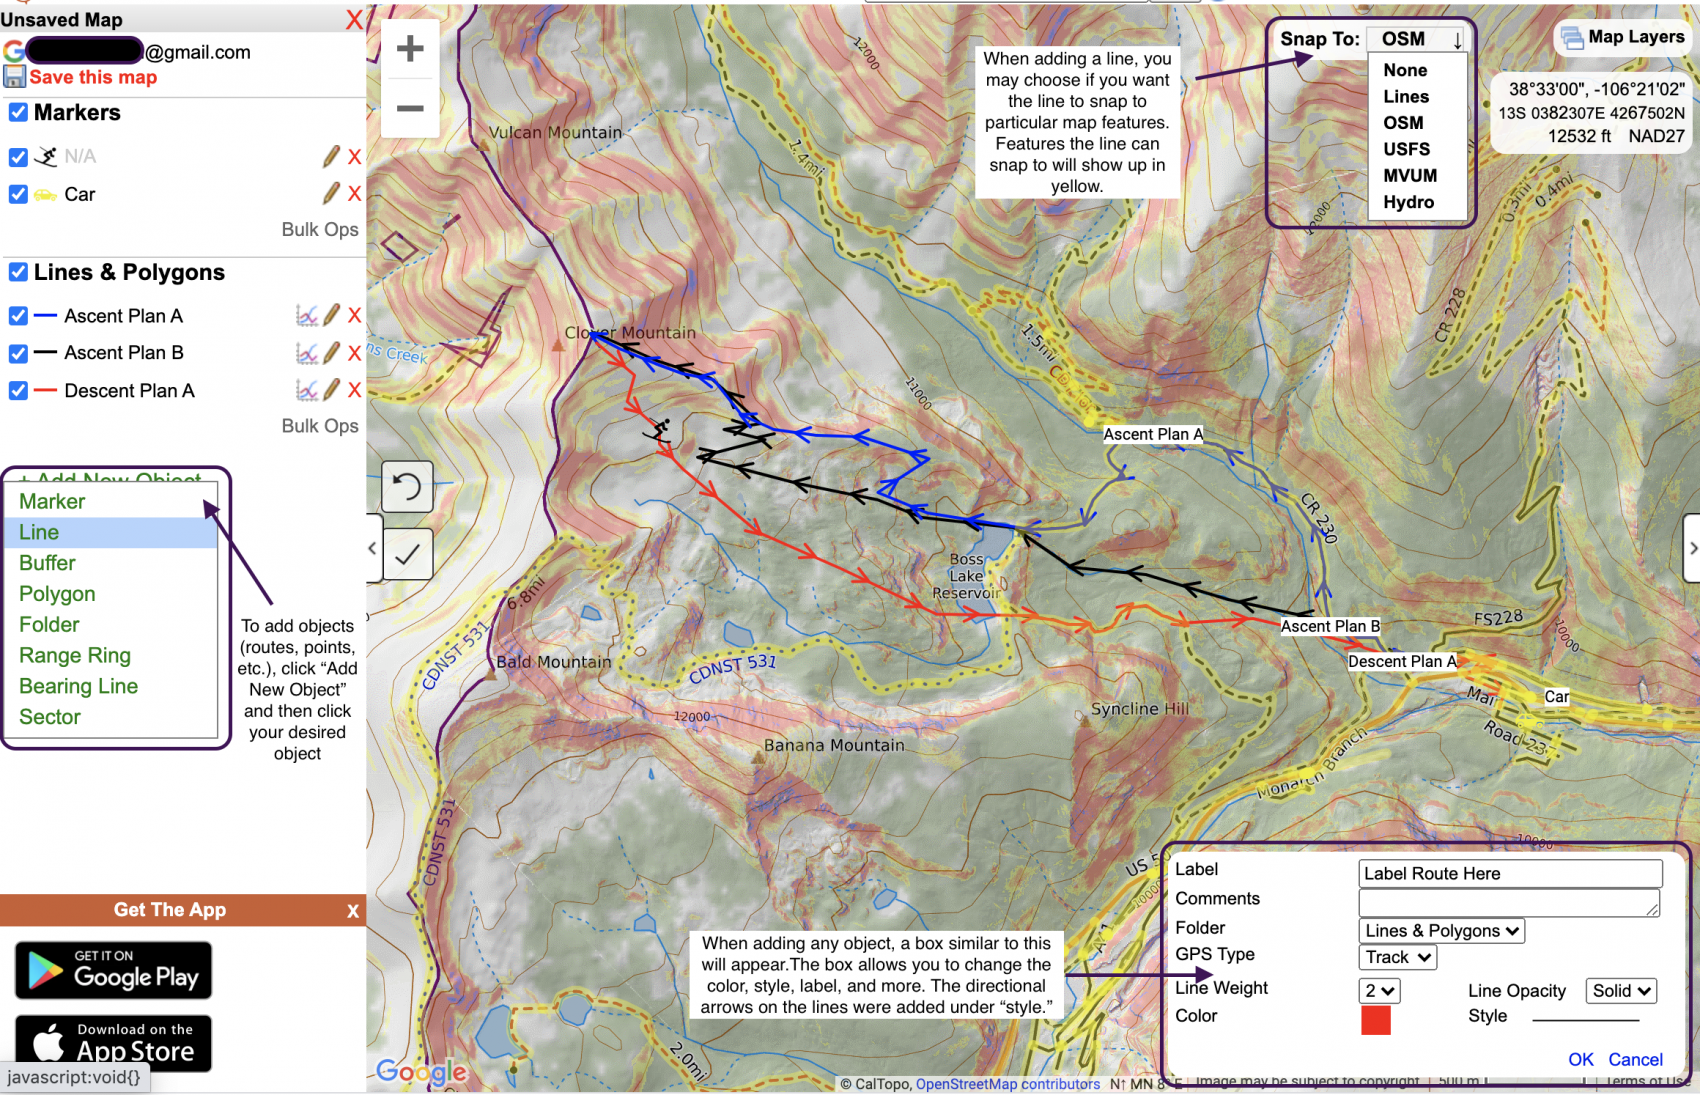
To add your route(s), click “Add New Object” then “line” on the toolbar on the left-hand side of the screen. This will give you a cursor to draw on the map. Click=draw, esc=undo, shift+click=freehand, double click=end. You also have to option to “Snap To” in the upper right-hand corner, which allows your line to snap to trails, hydro, and more depending on your base map. Add as many plans to your map as you would like. As a bonus, you can click “Add New Object” and then “Marker,” which will allow you to add waypoints to mark where you are parking, resting, skiing, etc. You can edit the color and style in every object you added, which allows for more easily distinguished routes.
Step Five: Save the Map
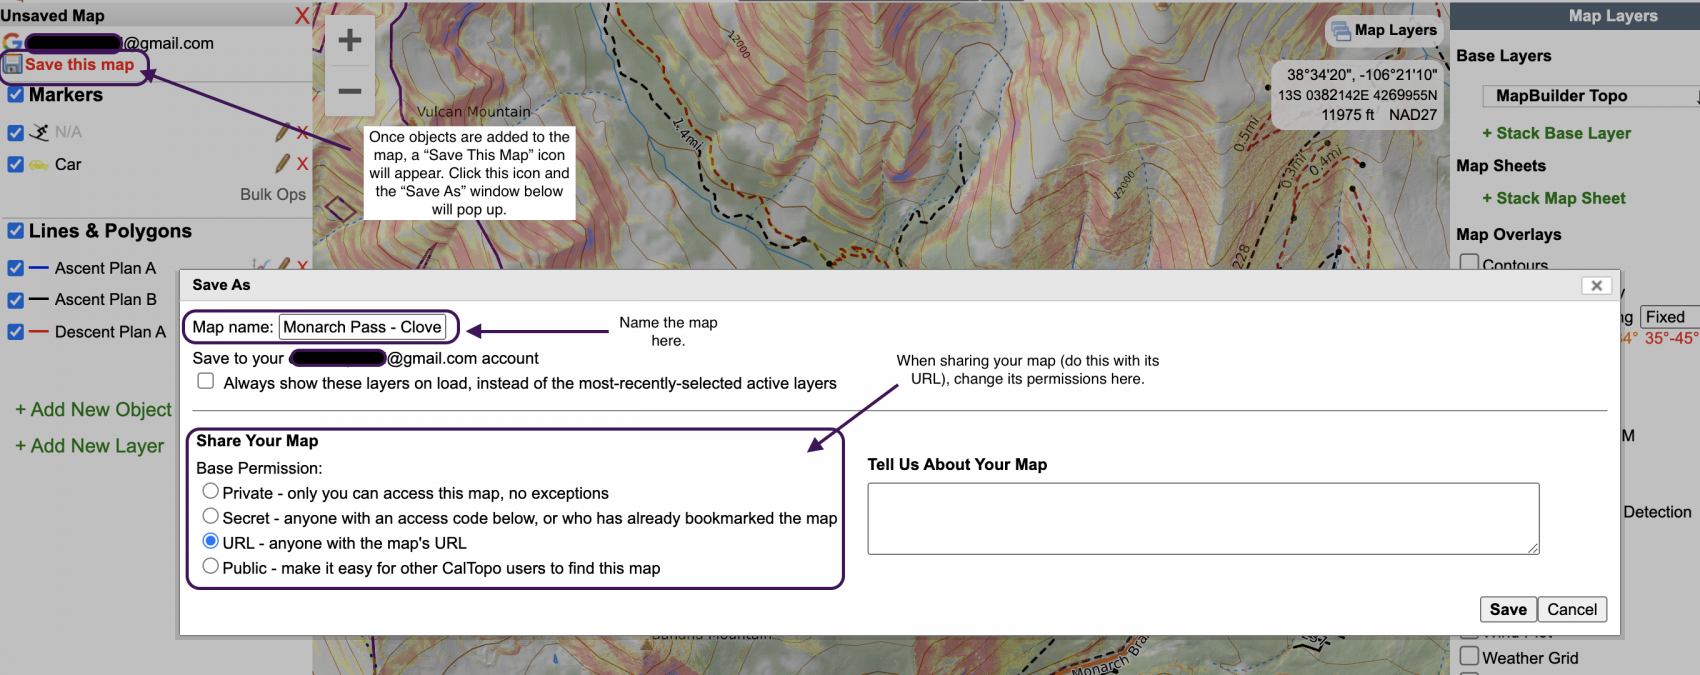
Once objects are added to the map, an option will be given to save your map below your email. Click “Save this map,” and CalTopo will open a window to name the map. Click Save in the bottom left-hand corner of the window. To access all of your saved maps and account information, click your email.
Step Six: Share and Collaborate
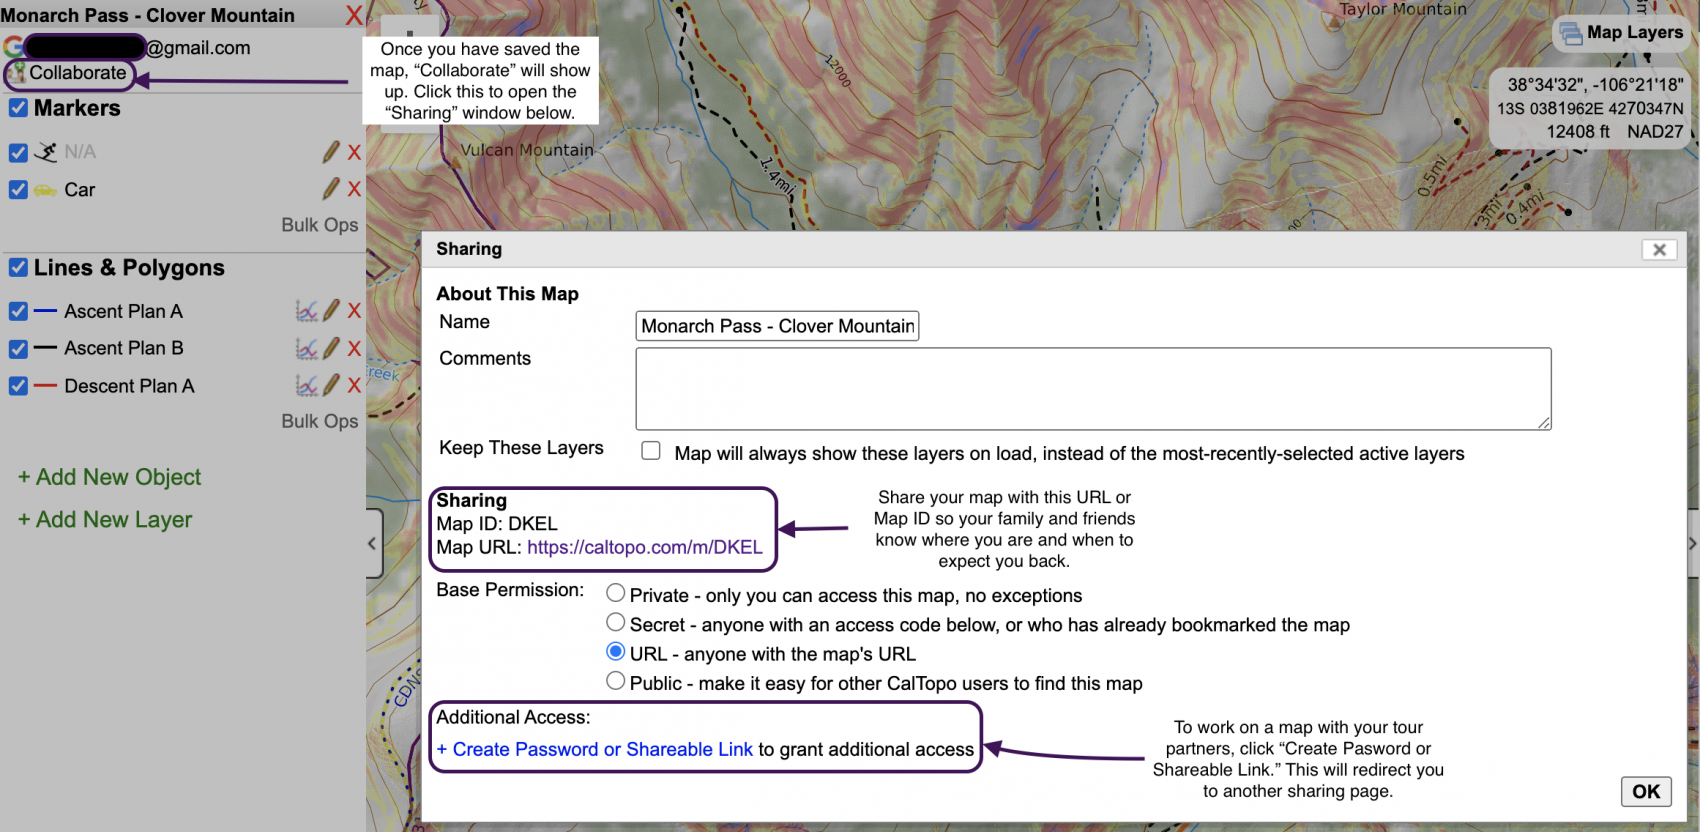
CalTopo offers a collaborative function to work on maps with your tour partners and share your map before leaving. This is one of my favorite features – you can share your map link with a friend so they know where you are, your backup plans, and when you will be back.
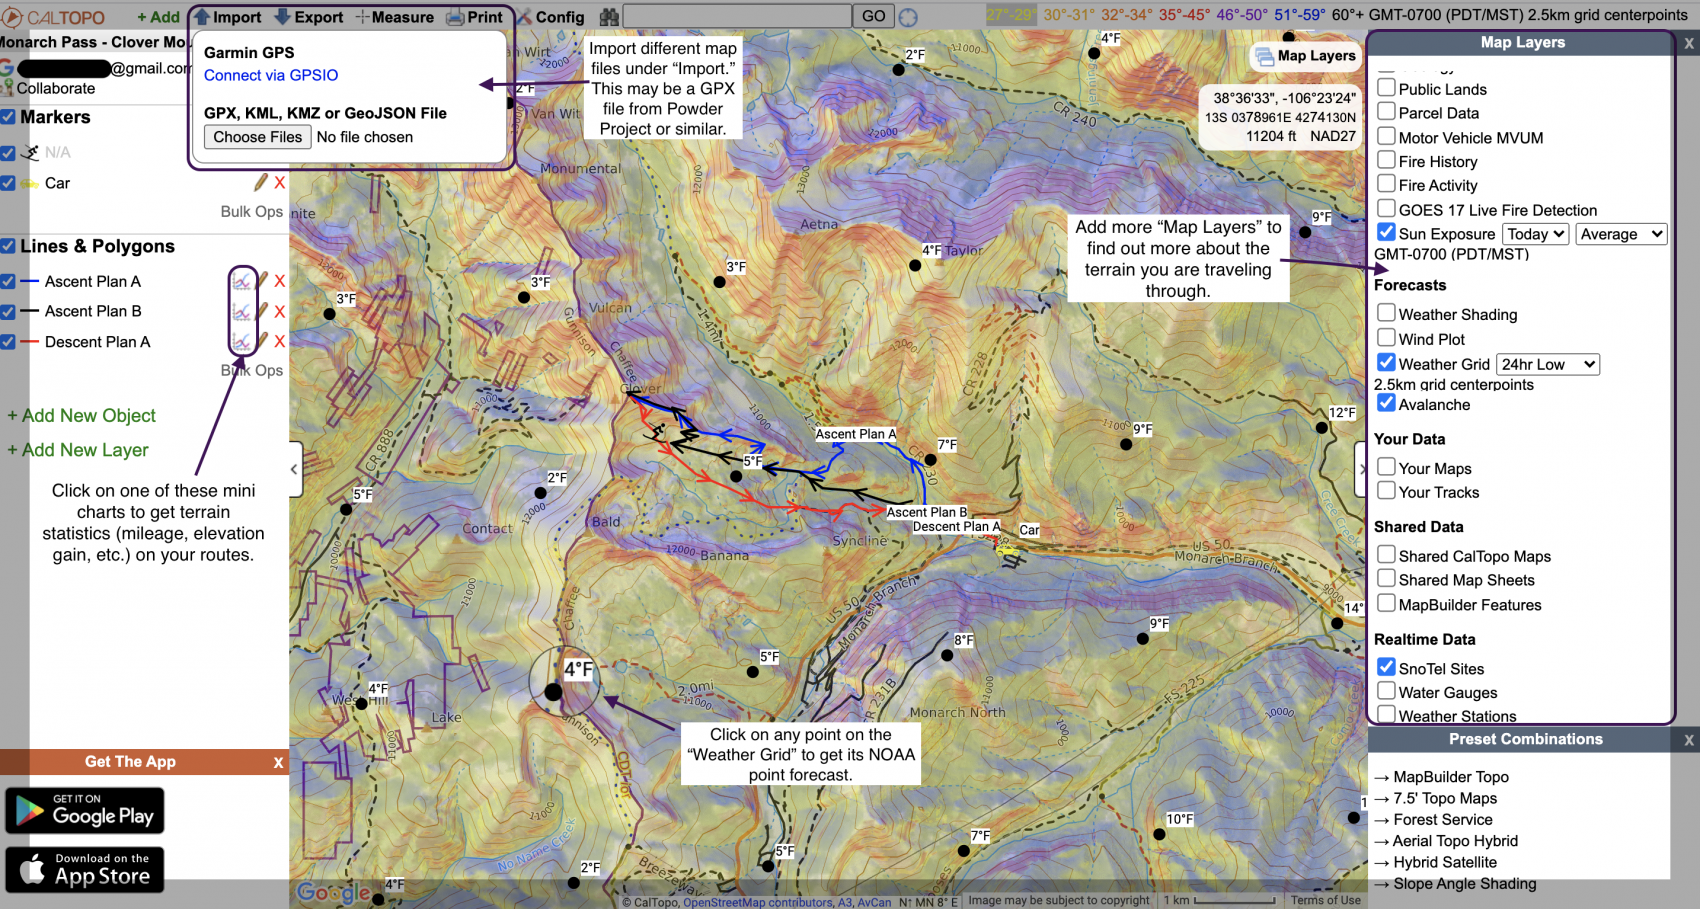
Step Seven: Extra Features
CalTopo has a ton of features that are nice additions to your tour plan. The picture below shows a few areas to add more features and do more to your map. There are far more features CalTopo offers, so I recommend exploring the site, watching their tutorial videos, and making future tour plans to become proficient with the software.