As the snow starts to fall in the western United States, it might be a good time to discuss how best to wax your skis or snowboard. Don’t know how to take care of your equipment? Do your friends ski past you all the time? Do you feel like you aren’t gliding weightlessly across a white ocean? We’ve got you covered. This post will teach you how to wax your skis effortlessly.
- Related: Things You Need For A Ski Tune Bench
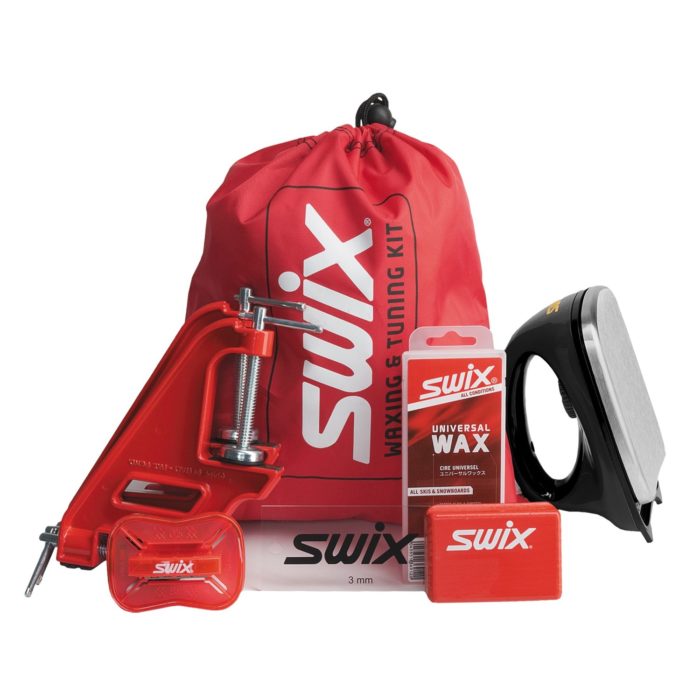
Equipment Needed
- Ski/Snowboard Vise
- Waxing Iron (not an actual iron)
- Fat Rubber Bands
- Wax
- Plastic Scraper
- Wax Brush
Step 1 – Prep the ski. Lay the ski on the vise binding side up. Take the large rubber band in one hand and pull the ski break up with the other. The large rubber band holds the brake up over the heel piece. Flip the ski over. Take the plastic scraper and remove all that old gunk on the bottom of your equipment. Wipe the base with a lightly wet cloth if there is dirt. You want to apply the new wax directly to a clean base.
Step 2 – Picking the right wax. Fire up that iron! Now, there are some nuances here regarding wax and iron heat that I will briefly go over. There are different waxes for different temperatures; warmer weather waxes melt faster at lower temperatures, and colder weather wax needs hotter iron temps. You can blend them when you get to know what you like. Universal wax is excellent for everyday use, and I typically go to it because it is cheap and works pretty well in all conditions.
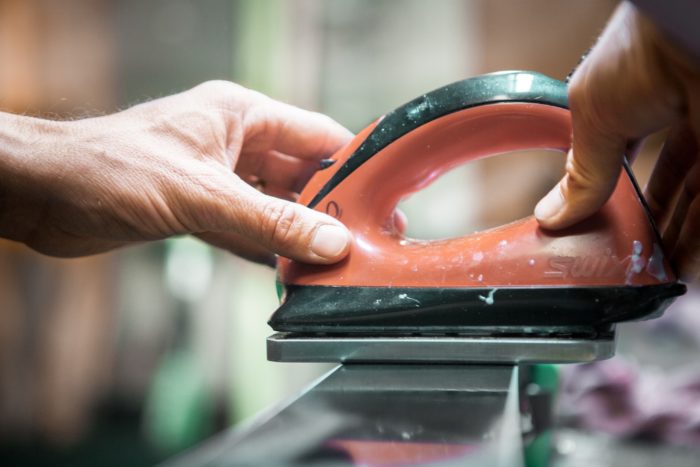
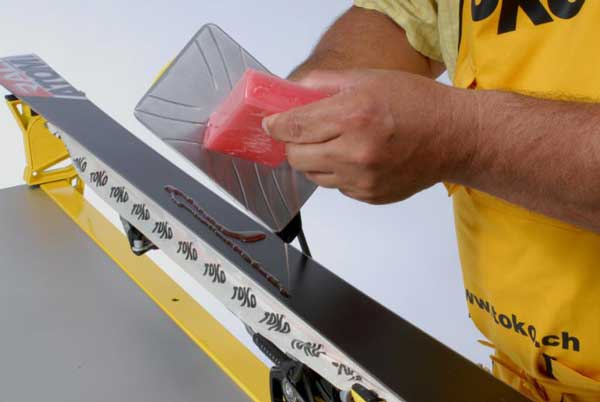
Step 3 – Applying the Wax. Fire up that iron! Don’t make it too hot to the point where it is smoking, nor have it too tepid to the point where it takes all day to melt the wax, and your beverage becomes warmer than the iron! Press a large piece of the wax against the warm iron, and hold the iron no more than 3 inches above the ski. Cover the base of the ski with droplets of wax (pro tip: not a ton of wax; it can go a long way, so don’t overdo it!) Iron on those droplets. Make sure not to hold the iron in one place, and make sure it coats the base evenly from tip to tail. I like to iron in little circles. Allow the ski to cool for around 30 minutes, the perfect amount of time for another beverage!

Step 4 – Scraping & Finishing Touches. Use that plastic scraper and scrape off the wax from tip to tail (it’s essential to go in the direction of how the ski slides). Hold at a 45-degree angle away from you. Also, apply even pressure while scraping so that even amounts of wax come off. Usually, there is a notch on the edge of the scraper; run this against your edges so there is no wax buildup on that important part. Once done scraping, get the wax brush and polish that ski off; wipe it down with a dry cloth, and you are good to go! Well, just one more ski to go…