- A team of climbers ascending the Coleman-Deming Route on Mount Baker. photo: Zeb Blais.
editor’s note: Zeb Blais wrote this post for his guide company Alpine Mountain Works. Please check out his site feel free to email him any questions here: info@alpinemountainworks.com
Climbing a mountain in a single push has strong pros and cons. It can be very rewarding to be able to pick off a peak in a number of hours instead of a number of days. The flip side is that it is harder for most people and requires much better movement skills on the terrain. Below are a few thoughts on single push climbing that will help you figure out if you’d like to give it a shot.
Speed is a necessity. It doesn’t make sense to do a single push that lasts 60 hours (unless you’re Mark Twight or Steve House and climbing massive lines in Alaska). You need to be able to get up and get off the mountain quickly. To make the team as fast as possible, you must reduce your climbing kit to it’s essence- just the essentials you need to maintain a reasonable margin of safety. Without the added weight of food, stoves, fuel, and tents your pack will be much lighter. But to truly travel fast and light I figure out what other ounces I can shave.
Cut weight. Besides camping gear, make sure you aren’t lugging any extra ounces. Grams add up to ounces, ounces to pounds, and pounds…well hopefully that’s as far as it goes, we’re not glamping. But all the things that seem small really do add up to appreciable amounts that slow us down. Here are a few ways to slim down your gear:
- Sunscreen – just bring a 1 oz tube! No need for the costco size on non-expedition climbs.
- Crampon Bags – these things weigh between a 1/4 and 1/2 pound. Don’t bring it, just wrap your crampons in your gaiters and throw em in your pack.
- Helmet- invest in a light helmet. A Petzl Ecrin Roc helmet weighs over a pound. You can save a 1/4 pound by getting a lighter plastic helmet like the Petzl Elios or Black Diamond Half Dome or save a 1/2 pound with an all Styrofoam helmet.
- Harness – if you’re doing a lot of alpine climbing or ski mountaineering, get something light! There are a lot of harnesses on the market that weigh around 8oz (CAMP Air CR, BD Couloir, Mammut Zephyr Altitude)
- Pack – Skip the straps and gimmicks. Get a light sack with a couple straps to put it on your back. This should weigh less than 2 pounds (Mountain Hardwear Summit Rocket 30L, Patagonia Ascensionist 35)
- Food- Bring what you need, no more! It takes experience to figure out what you will need for calories on a climb like this, and you don’t want to run out of food, but really work on not bringing too much extra!
- Water- ween yourself from the need to drink copious amounts of water. Strategize how many breaks you will take and consider how you will ration water. Since you will be moving faster, you will take fewer breaks, get the job done sooner and may be able to take less water. Also consider if water will be available on the route. If you know you can fill water bottles 2 hours in, don’t walk all that way with pounds of water!
To balance the safety equation with less supplies the team must move faster and be competent in the terrain. Mistakes without the resources we have on normal climbs (stoves, fuel, extra food, extra clothing, more people) have much higher consequences. Every team member must be capable on the terrain and highly self reliant. A twisted ankle means the end of a trip. A rain storm means the end of a trip. Running out of food a quarter of the way into the trip means the end of the trip. The safety net is small and in order to hit it when we fall we can’t climb too far above it.

A climber ascending the CD Route. Photo: Zeb Blais.
Know your mountain and your weather. On a normal climb, I tend to bring a standard set of layers and gear that allows me to cope with different weather conditions. Doing a single push, layers are specific to the weather forecast and the mountain you’re climbing. For peaks of lower altitudes (under 12,000′) I can usually cut a layer or two since it will be warmer. I’m looking for nice weather so that I can potentially chop more layers. This makes moving faster possible. It also means that if the weather turns out different than the forecast, the only option is to forfeit the attempt and get out of there. There is no sticking it out to see if the weather improves when you aren’t carrying a rain gear. Having visibility is another key to moving quickly, and it’s important to not be slowed down by thick clouds… yet another reason to turn around.
Travelling without a huge pack is not a substitute for fitness. Climbing with the lightest kit possible necessitates speed in the mountains. If you can’t carry a heavy pack and complete the climb in two days, you’re not going to be able to drop a few pounds from your pack and complete it in a few hours. Single push climbing is more demanding than breaking the climb up over a days even with the heavier packs. Training for this type of endeavor should have a focus on speed and intervals rather than solely endurance.
***
Earlier this week I guided a single push up Mount Baker’s Coleman Deming Route. Guiding this sort of trip is exciting, but also has the potential for complete and total failure. I was lucky to be teamed up with a fit climber who had done a fair amount of climbing with RMI Expeditions in the past. David had climbed Rainier, Denali, Aconcagua and a few others and had been prepping for an 8,000 meter peak this fall. When that plan fell through, he wanted to put something challenging and outside the box on his list. A single push on Baker seemed like a good place to start and test himself physically.
I was excited to guide the trip, but was somewhat apprehensive about climbing in this style with someone I had no experience with. The team needs to be prepared for climbing in this style. This isn’t for everyone and if fitness and movement aren’t at a fairly high level, this can be a setup for disappointment and increased risk.
We started from the Heliotrope Trail Head at 2:30 am. The weather was perfect. A slight nip to the air made walking in base layers comfortable without sweating too much. The sky was clear, except for the haze from nearby forest fires. We had the ideal weather for out single push attempt.
Less than two hours in, we were at the toe of the Coleman Glacier stopping to put on our crampons and fill our water bottles for the climb. We were on pace. Our packs got lighter as we ditched our running shoes on the moraine and pulled out our axes, crampons, harnesses, helmets, rope and crevasse rescue gear.

- Getting onto the Coleman Glacier from the Hogsback Ridge. photo: Zeb Blais

Our next big feat would be gaining the Coleman Glacier. This season the Coleman-Deming is melted out and broken in ways that it hasn’t been for years. In the dark, without knowledge of the current route through the crevasses I was worried the route finding would slow us down significantly. I led west toward the Heliotrope Ridge and found a likely entrance and we walked up roped together. To my surprise, the glacier had been holding up better than I expedited and we got onto the upper Coleman without delay. many climbers are walking dirt as far west as they can, ascending that and then getting onto the Coleman. This is a little less direct, but avoids the potential route finding snafus of ascending the glacier.
- David cruising the Coleman-Deming. (he’s just holding his pole that way in the photo, that’s not how he climbs with it 🙂 ). photo: Zeb Blais

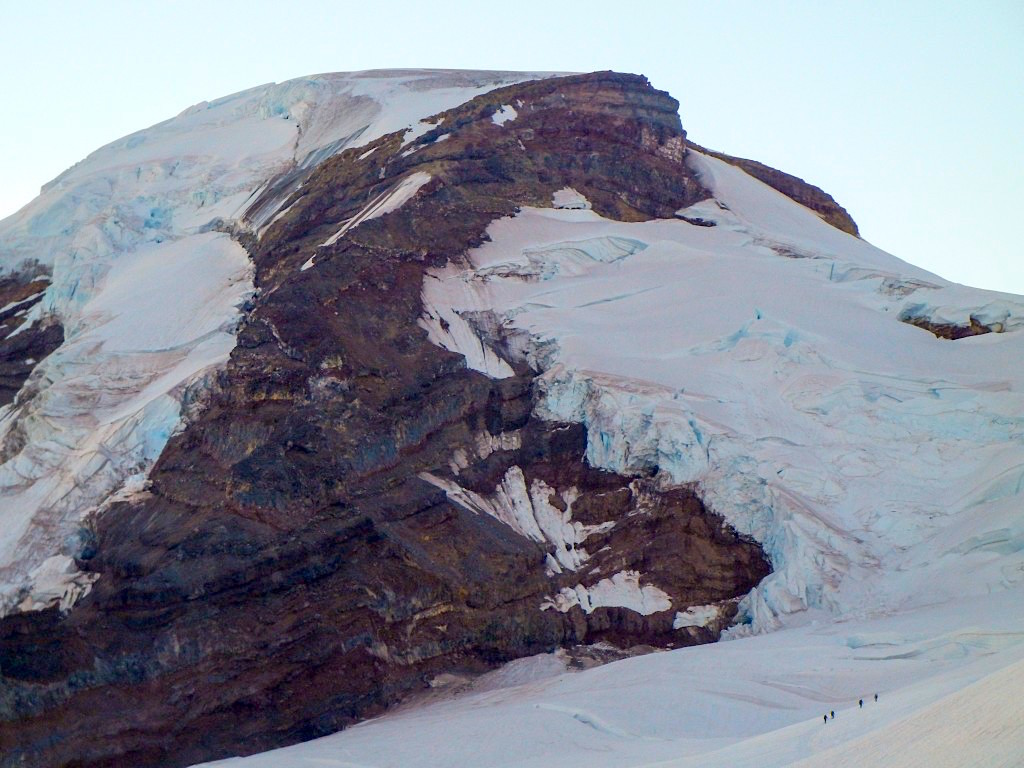
Once on the glacier, the route was very similar to a normal later season Coleman-Deming. Maybe a little less seasonal snow, but the route was still direct and solid. The pumice ridge between Colfax peak and the Roman Wall is completely melted out and so is a brief section of the Roman wall across the Deming, but both are easy travel without a lot of mucking around. With our light packs, we cruised this section, keeping out crampons on the whole way (actually kind of nice for the gravel of the pumice ridge).
- The top of the pumice ridge looking up at the Roman Wall. Still hangin’ in there! photo: Zeb Blais.


- Smoke engiulfing the cascades around Mount Baker. Photo: Zeb Blais.

On the summit we looked down at the sea of forest fire smoke engulfing the mountains around us. It was nice to be above it, breathing in the clear, high altitiude air at 10,781′. With no wind and no sign of approaching weather, we lounged on the summit for a half hour before heading down. Passing teams of bundled up climbers with big packs, we made quick work of the descent back to the Hogsback Ridge.
- Looking east from the top of Baker at the scary amounts of smoke below us. Photo: Zeb Blais.

We grabbed a half liter of fresh glacier water at Hogsback Camp, donned our running shoes and continued to the trail head. Without heavy packs we pushed the full distance back to the cars in about an hour and a half. Damn it feels good to be a gangsta.
If you’re interested in this style of climbing, contact me. I’ve done single push climbs on Rainier, Adams, Baker (Coleman-Deming and North Ridge) and a ton of others. I’d love to help you put together a trip and work towards your goal. This style works particularly well for ski mountaineering!
Here is a GPS track of the Coleman-Deming Route David and I used on August 23, 2015. USE AT YOUR OWN RISK. This route will change hourly due to melting and shifting of the Coleman Glacier. You should use this track only as a guideline- you need to rely on your navigation and route finding experience to make safe choices!