“Take a deck of cards – half are black, half are red; how much would you wager that the top card is red? That’s about risk. Here’s a deck of cards – at least one is black, at least one is red; how much would you wager that the top card is red? That’s about ambiguity.”
– Robert M. Sapolsky, – Behave
The conversation usually starts like this: “We knew the hazard was ‘Considerable,’ but we dug a snow pit and couldn’t get anything to go, so we were pretty confident about our decision.” In the best-case scenario, the speaker then launches into a harrowing tale of near-miss and lessons learned. Worst case? Well, I’m sure you can piece this one out for yourself. Unfortunately, this conversation is happening season after season, tragedy after tragedy. With the spike in new backcountry users, I’m afraid we will only hear it more and more. The problem lies in the temptation to ignore the holistic knowledge we gained by reading the avalanche bulletin and favor a first-hand, albeit extremely isolated, and anecdotal observation.
To elaborate on the quote from Behave above, making a go-or-no-go decision based on a snowpack test is akin to flipping one red card in a deck that contains hundreds of thousands and, based on that result, assuming that all the cards are red even though the guy who shuffled them told you they were mostly black.
Twenty years ago, we spent a great deal of precious teaching time discussing snowpack tests in introductory avalanche safety courses. Over the last decade, this has (thankfully) largely been replaced with topics such as understanding avalanche bulletins, terrain choices, decision making, and self-awareness under what has generally been dubbed “human factors.”
As one furthers their avalanche education, however, numerous formal and informal snowpack tests will be introduced. Much has been written about HOW to perform these tests, often leaving the learner in the following situation: “OK, I got a moderate resistant planar result down 50 centimeters. Now what?” To answer this question, we need to look less at the test result itself and more at the reasons the test was performed in the first place and what role it should play in our decision-making. Let’s look at the 5 W’s of snowpack tests.
Who?
Anyone traveling through the backcountry can and should get versed in a few snowpack tests. Early on, the focus should be on improving technique, efficiency, and observing the results without relying on them for your decision-making (unless they prompt you to be more conservative). What you will develop over time is a reference base for how weak and strong snow reacts to tests. Correlating these observations with reported avalanche activity is a powerful exercise. Two words of caution here. 1- Some days, you will find alarming clues in your tests and still be surrounded by groups center-punching aggressive lines and getting away with it. Do not assume that these people know better than you. They might but likely don’t. As they say: “Tracks in the snow are not necessarily a sign of intelligent life” 2- If you are riding with a ‘mentor’ who makes go-or-no-go decisions based primarily on a snowpack test, run before it’s too late. Once safely out of the mountains, it might be time for you to educate your mentor.
What?
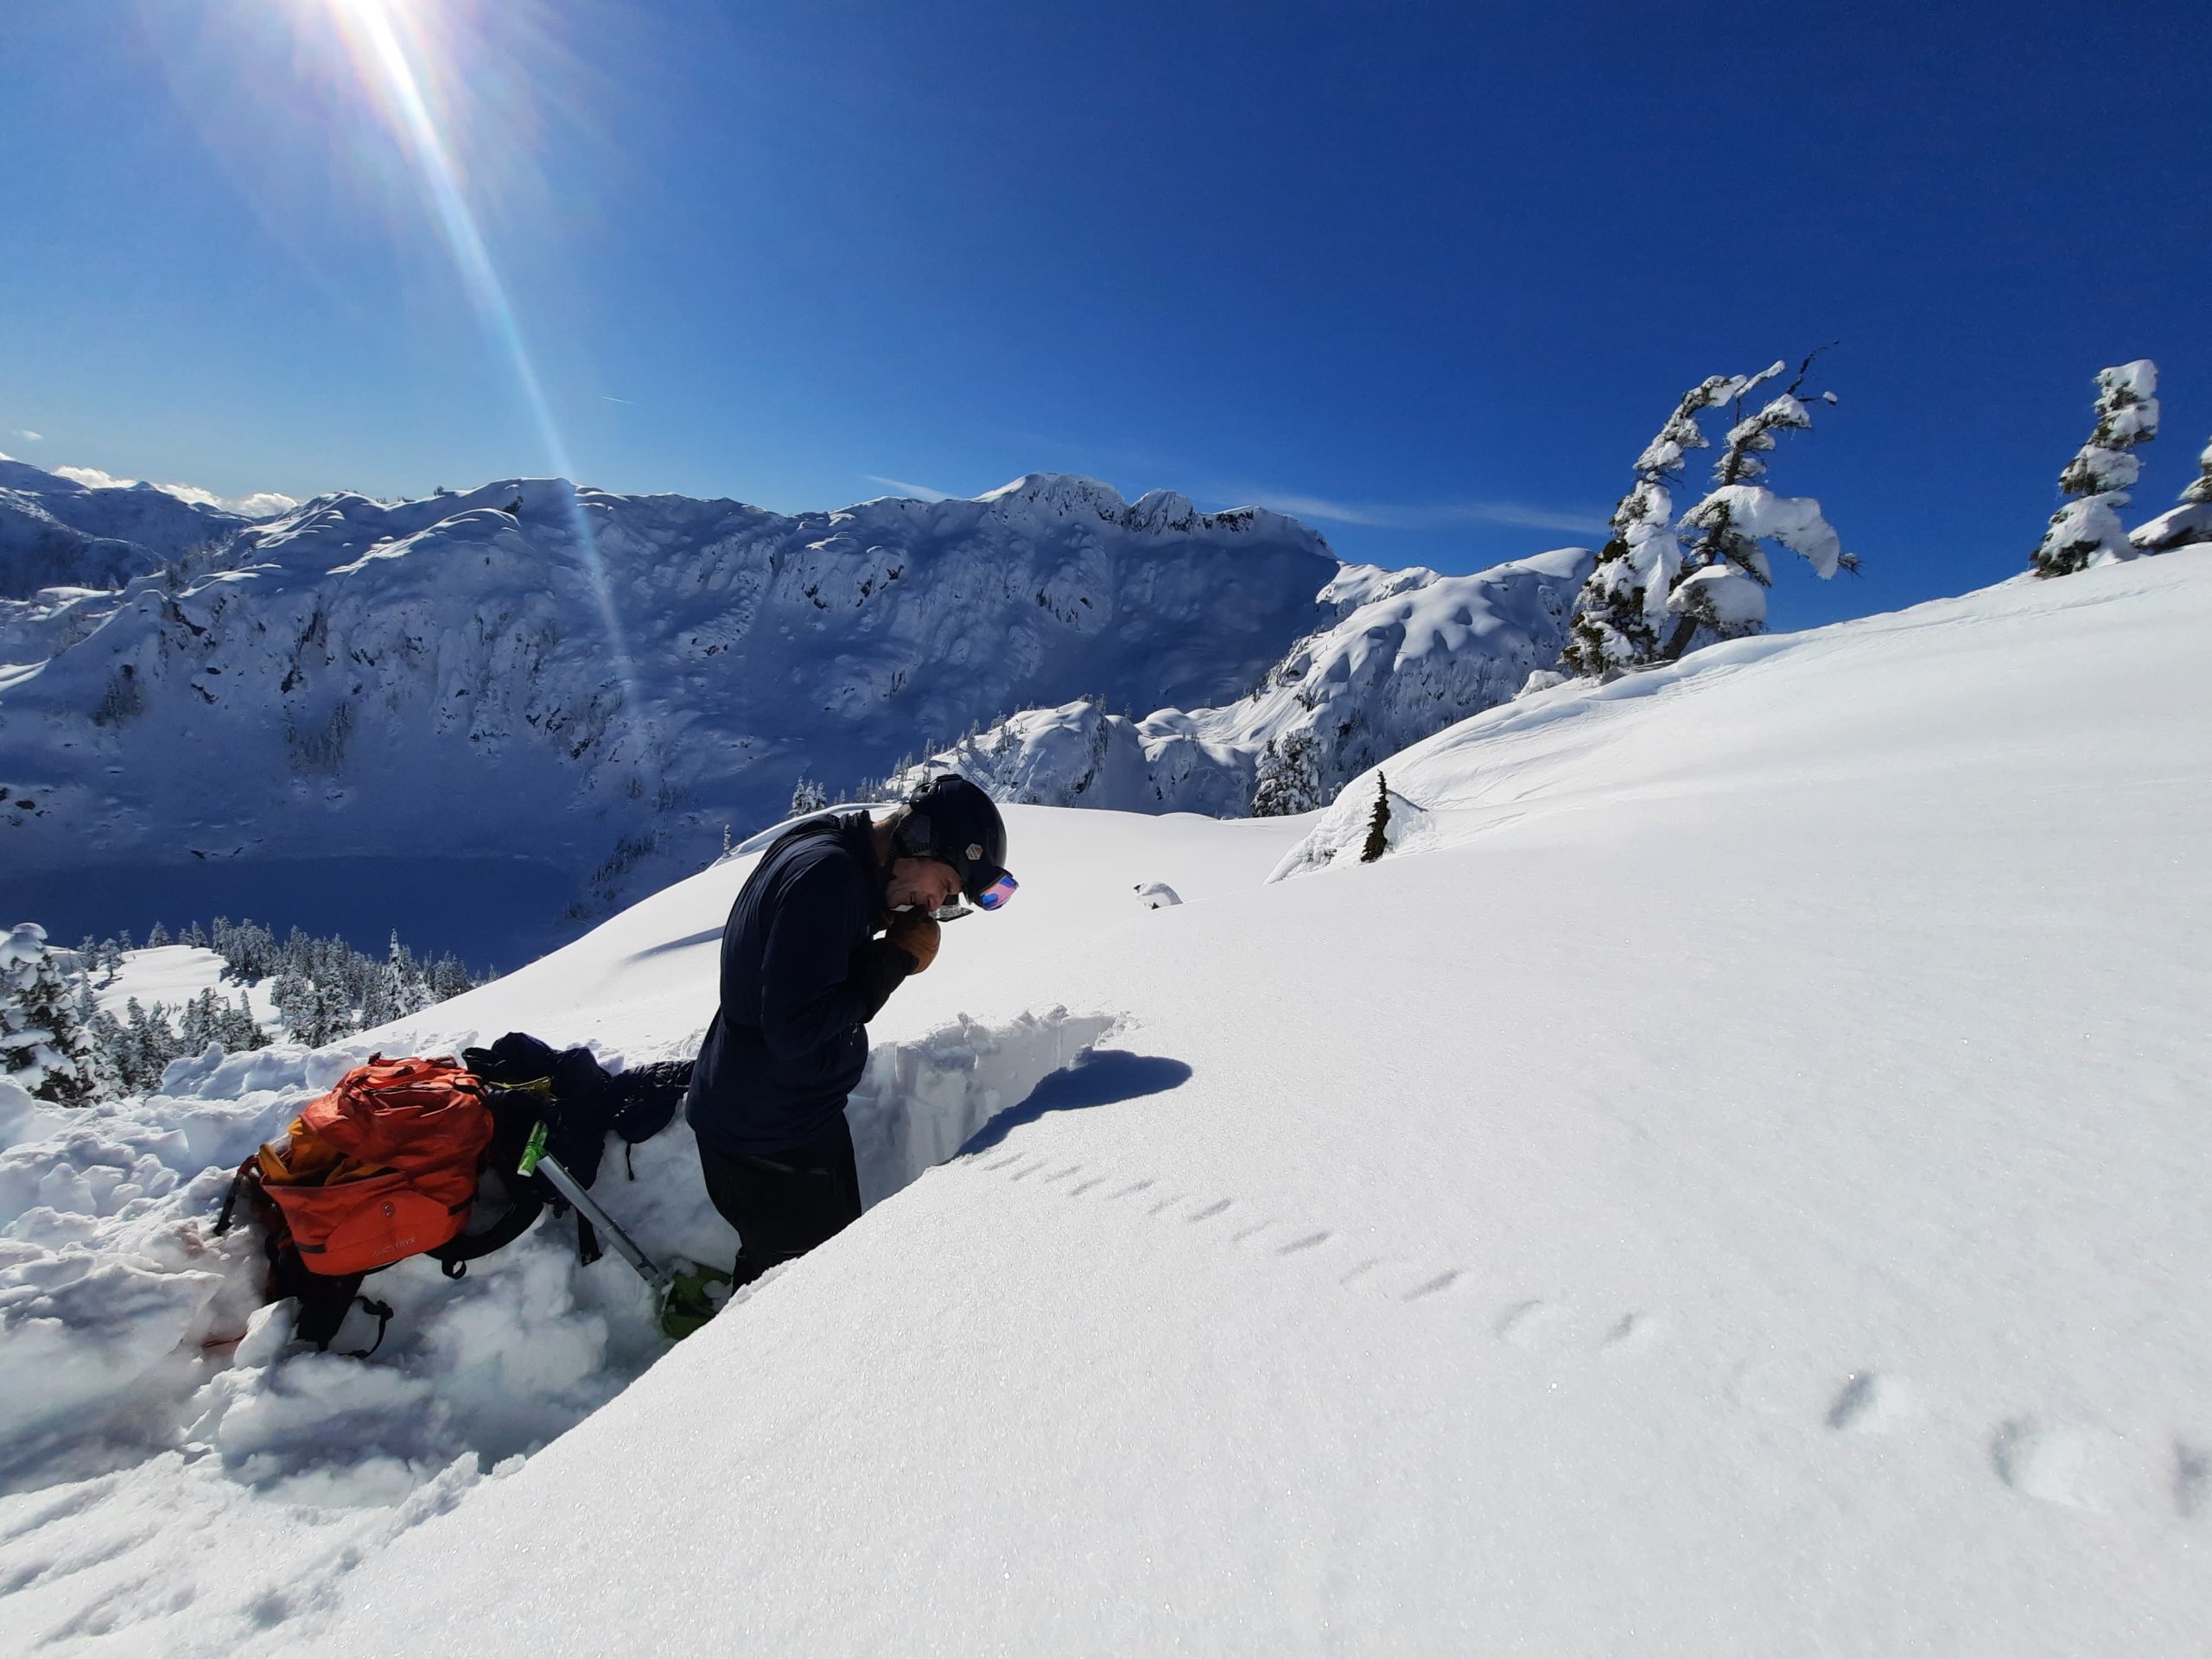
Never dig blind. There is an almost overwhelming amount of information available about snowpack structure between avalanche bulletins, social media, and the local pub. Spend some time studying this information and understand what the current avalanche problems are. Before you put the shovel to the snow, you should have a good idea of what it is that you are looking for. This brings us to the next W.
Where?
If I’m home looking for my ski boots, I don’t start by looking in the fridge and then declare them lost forever if they are not in the vegetable crisper. Avalanche problems are not uniformly distributed across all elevations and aspects. The three most important questions to ask yourself before digging are: 1- Am I safe here? Yes, people have died while making snowpack tests in an unsafe location. 2- Is this a good site to find what I am looking for? 3- Is this site representative of the slope you want to ski? This assumes that you came prepared, know exactly what to look for and where you are likely to find it.
You may have picked up on the fact that if you answered “YES” to questions 2 and 3, you might be trying to justify skiing a slope that was “red-flagged” to start with and are using anecdotal evidence to “prove the bulletin wrong.” See paragraph 1 for the likely outcome. A better ending to the sentence that opened this article would have been: “… we couldn’t get anything to go. That surprised us, but we assumed that our site selection wasn’t great and stuck to low angle terrain in the trees like we said we would”
Why?
So why bother? To answer this, we need to stop thinking of snowpack tests as decision-making tools and see them as isolated observations that can play a small but essential part in painting a better picture of the snowpack. Tests are helpful for: 1- Mapping out the extent of an existing problem, such as a surface hoar layer or a crust. 2- Tracking the depth of a weak layer storm after storm. 3- Monitoring the ‘healing’ of a week layer over time as test results become harder and more resistant. 4- Discovering new or isolated problems that were not described in the avalanche bulletin, 5- Make a spot observation to reinforce our knowledge that the problem at hand is seemingly NOT in the areas we “green-flagged.” 6- Sharing observations with the community to help increase everyone’s understanding of the snowpack structure.
When?
In a nutshell: Always! As legendary avalanche consultant Chris Stethem said in Sherpa Cinema’s The Fine Line: “You got to see what you need to see when you get a chance to see it.” Not only do we need to be attuned to the problems we know exist, but we also must constantly be on the lookout for problems we might be unaware of or that lurk only in isolated terrain features. Snowpack observation doesn’t begin at the trailhead on the morning of your tour. It starts with the first snowfall of the season and should be part of your daily routine whether you are out in the mountains or not.
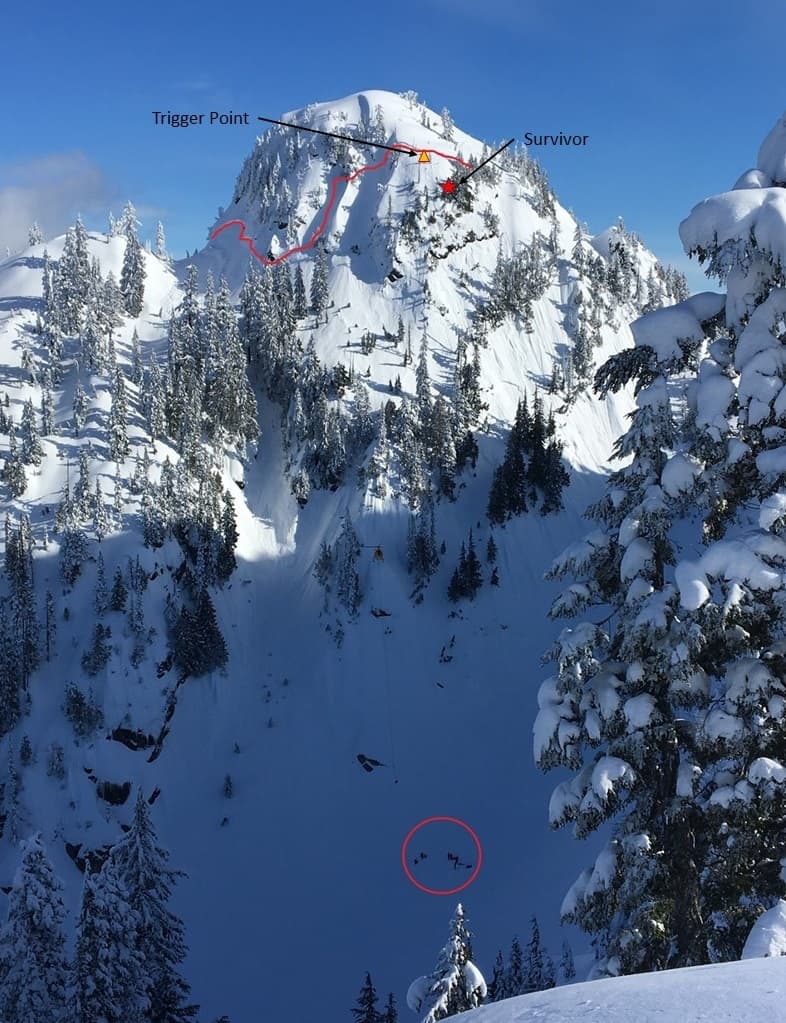
Fatal avalanche in the North Shore Mountains of BC. On the day of the avalanche, the hazard was rated “Moderate” because of a reactive crust specific to West aspects at treeline. A profile dug on a well chosen slope during the accident investigation easily revealed the very touchy weak layer down 70 cm. Tests on any other aspects or elevation produced no results. Even heavy skier traffic, rapid warming and intense solar radiation on that day didn’t manage to produce any other avalanches. Knowing what to look for and where to find it was critical. Credit: Peter Marshall
Putting it all together
So how do you integrate the snowpack test to manage your risk? Let’s look at this scenario. We plan to ski the South Face of mt Tweedledee, a 35-to-40-degree, 500m open run beginning at an alpine ridge and running to treeline. We are hopeful because it’s been cloudy and snowing lightly with light to moderate northerly winds all week. The bulletin for the day rates the hazard in the alpine at Moderate, with the two problems being storm slabs on all aspects and soft wind slabs on south aspects near the ridge top. The snowpack discussion mentions that around 30cm of new snow (up to 65 in wind-loaded areas) sits on a sun crust found at and above treeline on solar aspects. The bond to the crust is questionable, but no recent avalanches have been reported.
Because we know that MODERATE means that large human-triggered avalanches are possible in isolated areas, we deduct quickly that the “isolated area” looks an awful lot like the south face of Tweedledee near ridge top where 65cm deep soft wind slabs sitting on a sun curst might be found. Before we’ve even left the house, we’ve decided that the south face was a no-go. We agree to hit the steep north-facing glades instead.
On the way up, I’ll try to gather some information about the south face. I’ll find some short, safe south slopes to try a couple of ski cuts to test the bond to the crust and slab property of the new snow. I’ll probe around in many different places to evaluate the presence and depth of the crust, especially in places that are not as obvious for sun crusts like east and west aspects. I’ll keep an eye out for signs of wind transport and try to get some depth near ridgetop if I can do it safely. If I find a suitable worst-case scenario spot (wind loaded and south-facing) to dig, I might do a couple of more standard tests like an extended column to really test the bond to the crust and propagation potential. What drives these observations is curiosity about the snow and a desire to come back to the South Face LATER in the season, NOT to overrule our initial decision.
Poking around for things that should be there also allows me to validate the bulletin. If my observations match my expectations, I gain confidence in the bulletin. It confirms that our decision to avoid the south face was sound, and we’ll proceed with the plan.
The less my observations match my expectations, the more uncertain I become. Rather than feeling reassured that the south face is probably safe, I will now question everything because what I thought I knew about the snowpack doesn’t seem accurate. The more confused I am, the more likely I am to ski down our low-angled ascent route, no matter what the rating is.
Before we drop-in, I’ll poke around to confirm that the crust is nowhere to be found. Who knows, on that fateful, crust-forming sunny day, clouds might have moved in in the afternoon, and the greenhouse effect melted the surface on north aspects too. I’ll be looking for unknown problems like unsuspected surface hoar. (North facing open glades are a good spot for that, especially if there was a recent clear period that formed sun crusts on south aspects) Satisfied that my test didn’t reveal anything unexpected, we’ll drop in one at a time, following standard precautions. Once safe at home, I’ll try to broadcast my observations and listen to what other groups have seen. I’ll likely find out that a party of eight shredded the south face shortly after we dropped down the north side and had a fantastic day. It will sting a little, but ultimately, I have learned to be OK with that. Their uneventful descent is far from proof that the slope was safe. It’s just another observation. A committing snowpack test, if you will. At the end of the day, I must be OK with MY decision, not theirs. I decided based on my best judgment, my understanding of the snowpack, and my risk tolerance. That’s the best I can ask for.
This post was contributed by Andre-Jean Maheu, a professional member of the Canadian Avalanche Association based in Squamish, BC with 20 years of experience in various aspects of the avalanche industry including education, search and rescue, ski resorts and industrial avalanche mitigation.
3 thoughts on “Avalanche Safety – Digging a Snow Pit | The 5 Ws of Snowpack Test Decision Making”
Great information, I really want to avoid peak Avalanche season. When is the best time to avoid the worst part of avalanche season? Please post more information on Avalanche season and when it’s less likely to avalanche. Thank you
Great information, I really want to avoid peak Avalanche season. When is the best time to avoid the worst part of avalanche season? Please post more information on Avalanche season and when it’s less likely to avalanche. Thank you
very informative and enlightening
Truly excellent article and really well written. Thanks!